We can manipulate large volumes of text in a single cell using the Excel Wrap text feature. In this tutorial, we will explore how to wrap text and unwrap text automatically, as well as insert a line break in our text wrap. We will also learn how to fix common challenges that may fail to wrap text.
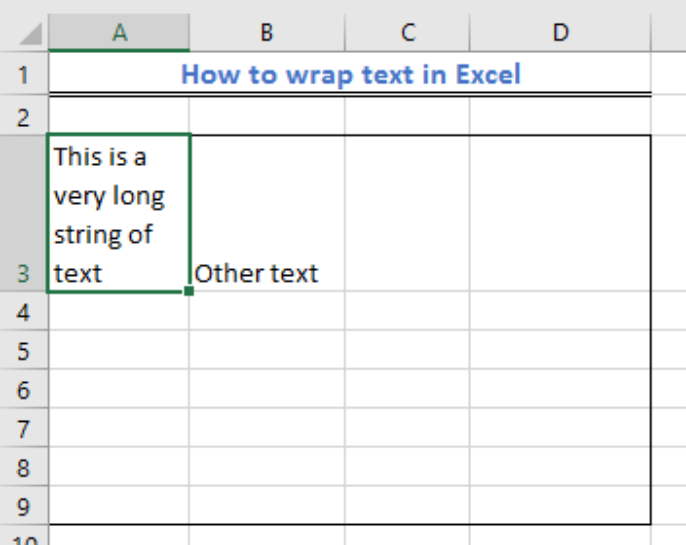 Figure 1 – How to wrap text in excel
How to Ensure Text Automatically Wraps Around Excel
When we wish to force a long text string into a single column automatically, we may use one of these two methods:
- We can select the cells and Navigate the Home tab to the Alignment group, and tap the Wrap Text button.
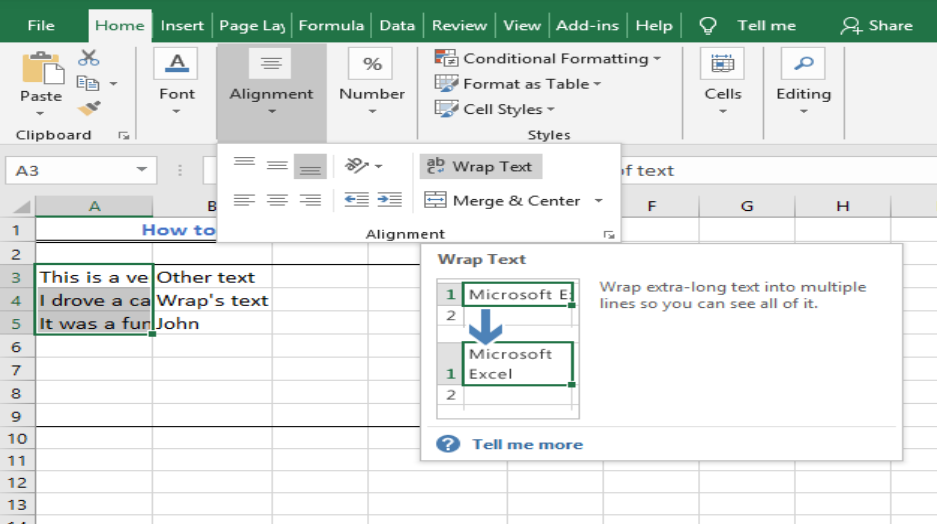 Figure 2 – Text wrap in excel
- We can equally select the cells and click Ctrl + 1 to redirect to the Format Cells dialog. Now, we will switch to the Alignment Tab and check the excel text wrap box. Click OK.
 Figure 3 – Automatically wrap text in excel
How to Unwrap Text in Excel
We can easily unwrap text in Excel using two methods like the previous section:
- We select the cells, go to the Home tab, then Alignment Group and unselect the Wrap text button
- We will select the cells, press Ctrl +1, go to the Format Cells Dialog and unmark the Wrap text box in the Alignment tab.
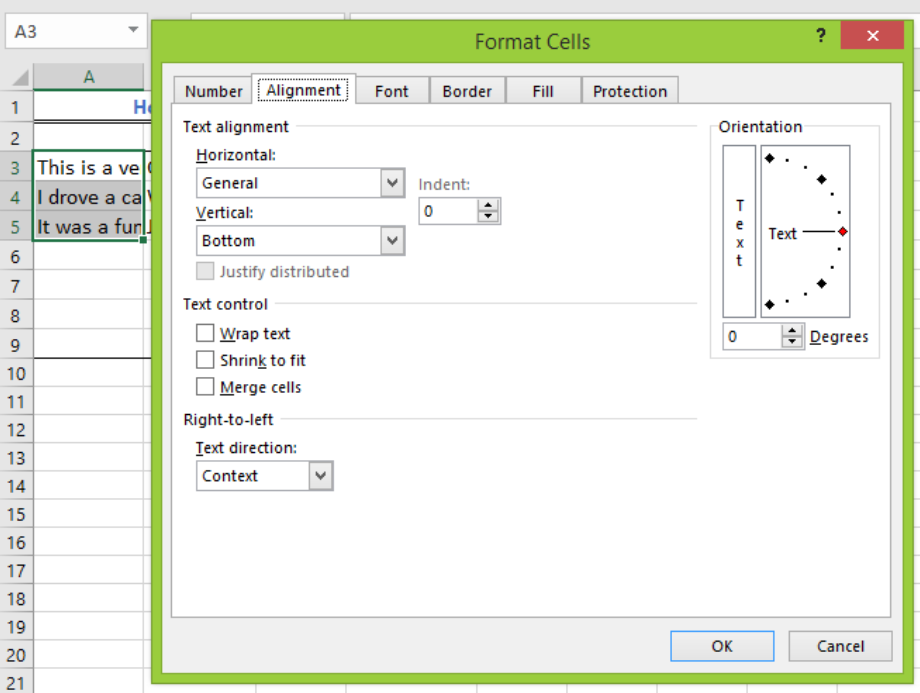 Figure 4 – Unwrap text using the Format Cells Dialog
How to Insert a Line Break Manually
When we insert a manual line break, we turn on the text wrap option automatically. We may wish to start a new line at a specific position rather than automatically wrap text. To enter line break manually:
- We press F2 to enter cell edit mode, or click on the formula bar or double-click on the cell.
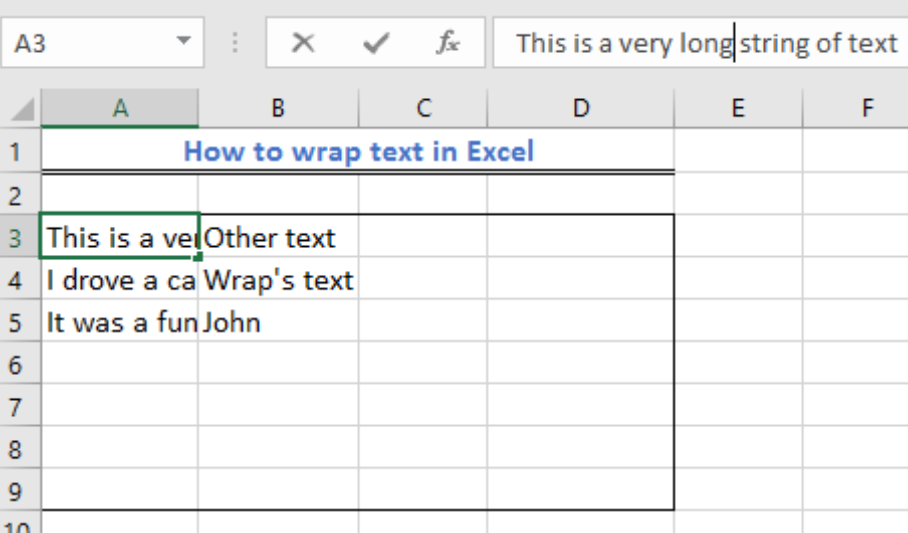 Figure 5 – Insert line break to wrap cells in excel
- Next, we place our cursor where we wish to break the line and press Alt + Enter.
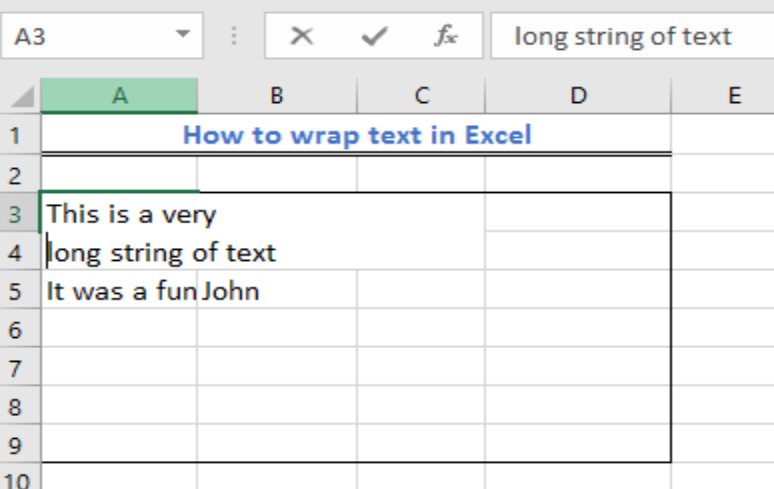 Figure 6 – Excel text wrap
How to Fix the Excel text wrap Not Working
Here are some common scenarios where the Excel wrap text feature fails and how to correct them.
Fixed Row Height
Our text may not wrap if we have fixed the row to a certain height. We can fix this problem by:
- Selecting the cell with the issue
- Navigate to the Home Tab, then the Cells Group
- We will click format and select AutoFit Row height
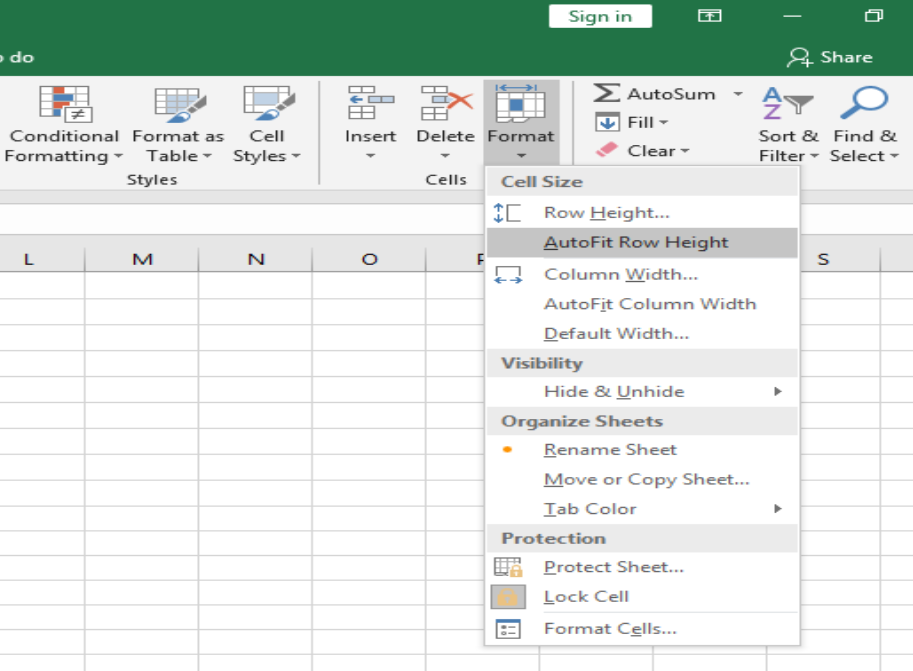 Figure 7- Fix Auto height problem
Merged Cells
We cannot use the Excel Wrap text for merged cells, so we need to decide whether we want to merge cells or wrap text. If we want to keep the merged cells function, we can make the column wider. When we decide to wrap text, we must unmerge cells by clicking Merge & Center in the Alignment group in the Home tab.
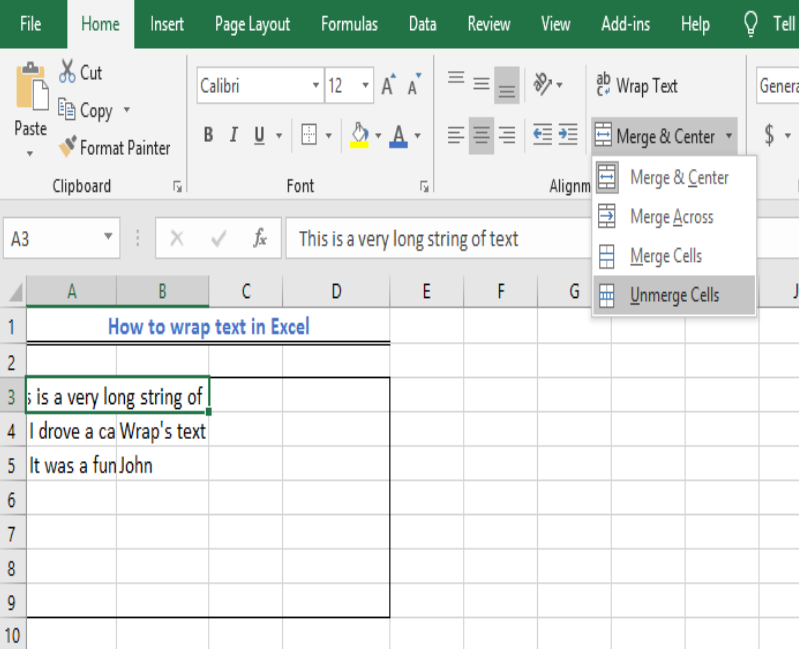 Figure 8 – Unmerge cell to wrap columns in excel
Have a wide cell to display value
When we have a wide cell that already fits properly with our data, it becomes difficult to wrap text even when we resize the column. To force the excel wrap text feature in that cell, we will turn the Excel Wrap Text button off and then turn it off again.
Explanations
We use the Excel text wrapping function when the data input in a cell is too large to fit. Typically, our data may extend over the cell border into the column to the right if it is empty. On the flip side, our text string may be cut off at the cell border if the adjacent cell contains data.
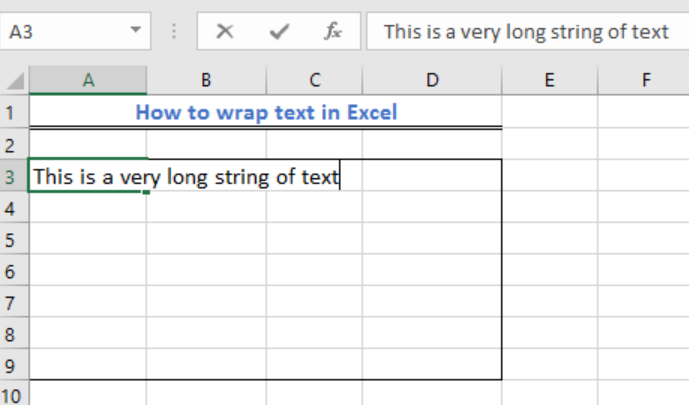 Figure 9A – Text enters the next column
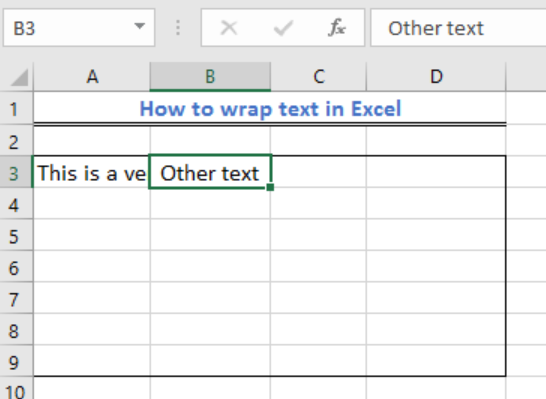 Figure 9B– Next Column Text truncates Cell 3A
However, with the Excel wrap text feature, our text will be displayed fully without overflowing into the next cell.
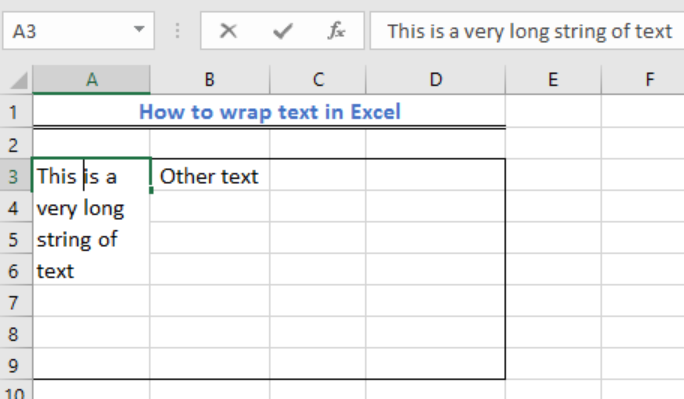 Figure 10 – Excel text wrap in a cell
Instant Connection to an Expert through our Excelchat Service
Most of the time, the problem you will need to solve will be more complex than a simple application of a formula or function. If you want to save hours of research and frustration, try our live Excelchat service! Our Excel Experts are available 24/7 to answer any Excel question you may have. We guarantee a connection within 30 seconds and a customized solution within 20 minutes.


Leave a Comment