

We can create a drop-down menu in preparing a pivot table to ensure that there aren’t spelling mistakes. This also prevents values that we do not allow to be entered into the table. The steps below will walk through the process.
Creating the Options for the Drop-down Menu
- We will open a new sheet and type the content that will form the main part of our table
 Figure 1: Options for the Drop-down List or menu
- We will select the range where we will insert only values present in the list. We will use A3:A11
- We will click on the data tab
 Figure 2: Click on Data Tab
- We will click on Data Validation
 Figure 3: Using Data Validation Feature
- We will select List in the Allow Validation criteria and select the range (I3:I5) of the options for the list as the source
- We will click on OK
 Figure 4: Drop-down Menu
- If we enter a value in the range (A3:A11) that is not in I3:I5, we will receive an error message
 Figure 5: Error message due to an Invalid Input in the range
Setting up the Data
- With the drop-down menu, we will create data that has clients and Sales
- We will select the range A2:B11
- We will click on the Insert tab and click on Table
 Figure 6: Clicking on Table
- We will click on OK
 Figure 7: Create table dialog box
 Figure 8: Created table
Inserting the Pivot Table
- We will click on anywhere within the table and click on Pivot table as shown in figure 7
- We will fill the Location field as D3 and check the existing worksheet box
 Figure 9: Creating the Pivot Table
- We will click OK
- We will check the Pivot Table Fields as shown in figure 11
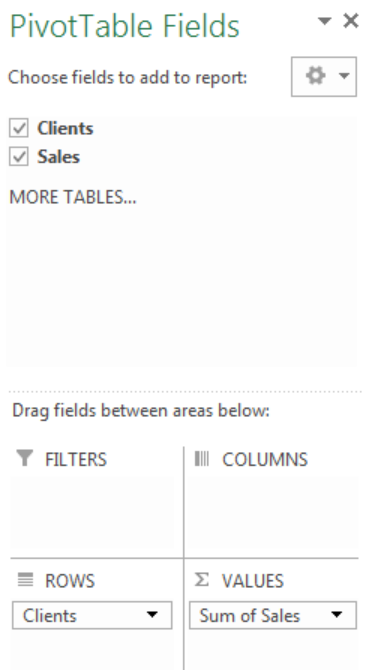 Figure 10: Checking Pivot Table Fields
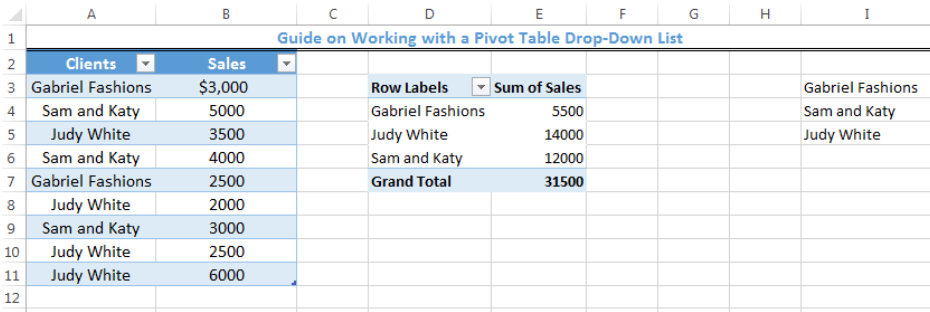 Figure 11: Created Pivot Table
Adding values to the Pivot Table
- Assuming someone wants to add another client to the Pivot Table, if the individual adds a name that isn’t in I3:I5, an error message is displayed.
- We can add more values by placing the cursor on CELL A11 AND PRESS ENTER. This will make the table to continue the range. If we simply click on Cell A12, the result will be allowed but can’t go into our Pivot Table.
 Figure 12: Adding Values to the Pivot Table
- After adding the values, we will click on a cell within the pivot table. We will right-click and click on REFRESH to update the pivot table
Instant Connection to an Expert through our Excelchat Service
Most of the time, the problem you will need to solve will be more complex than a simple application of a formula or function. If you want to save hours of research and frustration, try our live Excelchat service! Our Excel Experts are available 24/7 to answer any Excel question you may have. We guarantee a connection within 30 seconds and a customized solution within 20 minutes.


Leave a Comment