

Data Validation is a feature in Microsoft Excel which restricts the values or type of data that users enter into a cell. It automatically checks whether the value entered is allowed based on the specified criteria. This step by step tutorial will assist all levels of Excel users in allowing unique values only.
 Figure 1. Final result: Data validation unique values only
Working formula: =COUNTIF(C$3:C$7,C3)<2
Syntax of COUNTIF Function
COUNTIF returns the count or number of values in a specified range based on a given condition
=COUNTIF(range,criteria)
- range – the data range that will be evaluated using the criteria
- criteria – the criteria or condition that determines which cells will be counted
Setting up Our Data
Our table consists of two columns: Name (column B) and Student ID(column C). We want to ensure that a Student ID is unique to each student. We can restrict the values entered in column C and allow unique values only by applying Data Validation.
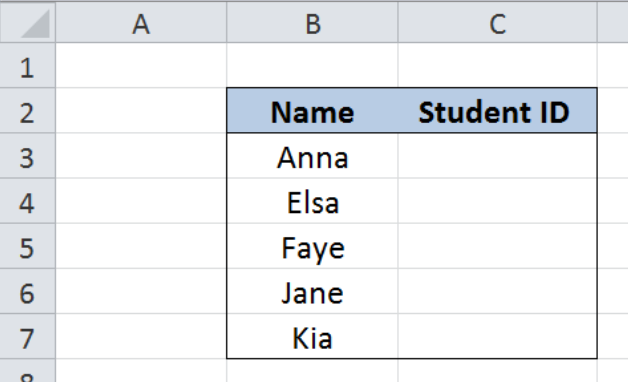 Figure 2. Sample data: Data validation unique values only
Allow unique values only
We want to restrict the Student IDs entered in column C to be unique for each student. We can do this with Data Validation by following these steps:
Step 1. Select the cells whose values we want to restrict. In this case, select cells C3:C7
Step 2. Click the Data tab, then the Data Validation menu and select Data Validation
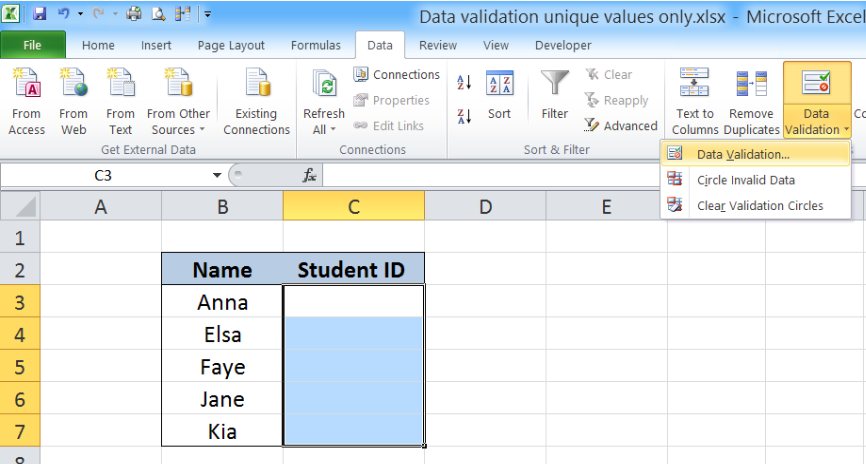 Figure 3. Selecting Data Validation
The Data Validation dialog box will pop up.
 Figure 4. Data Validation preview
Step 3. Click the Allow: drop-down button and select Custom as Validation criteria
Step 4. Enter the following in the Formula bar: =COUNTIF(C$3:C$7,C3)<2
The dollar signs “$” are necessary to fix specific cells in our formula and enable the validation criteria to work properly for all selected cells.
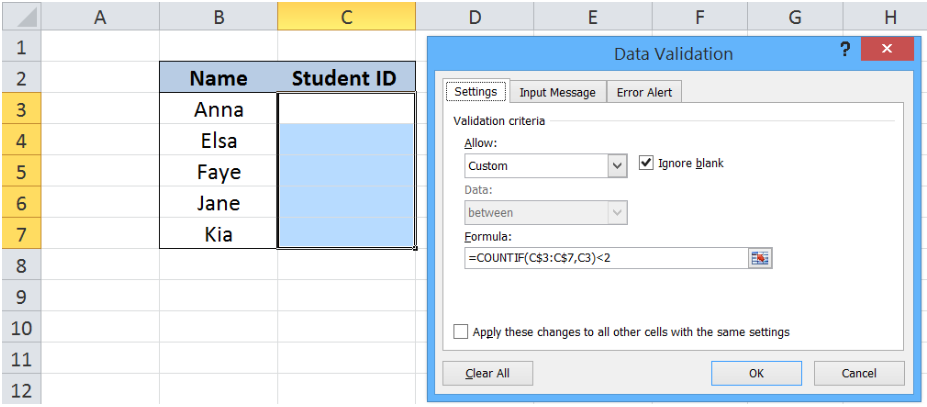 Figure 5. Creating a data validation rule
Our COUNTIF function returns the count of the value in C3 within the range C3:C7. Our formula checks if the value entered in C3 does not already exist in the range C3:C7.
If the formula returns a count less than “2”, specifically “0” or “1”, Data Validation passes and the value is allowed. Otherwise, Data Validation fails and the value is restricted.
Step 5. Click OK
We have now restricted the values in C3:C7 to allow only unique values. Let us try and enter “19001” into cell C3.
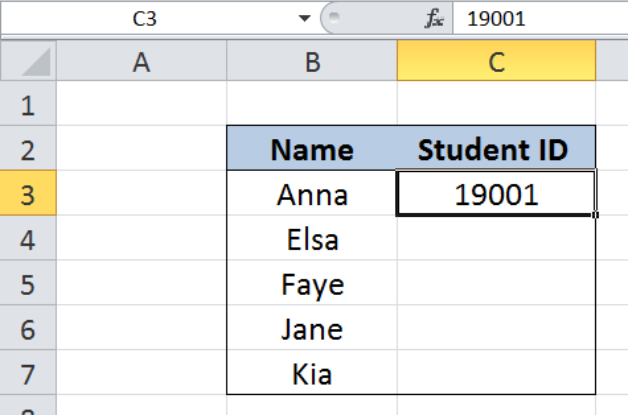 Figure 6. Unique value “19001” allowed by Data Validation
The Student ID “19001” is allowed because it is unique in column C, and no other value is entered yet. Now let’s input “19001” into cell C4.
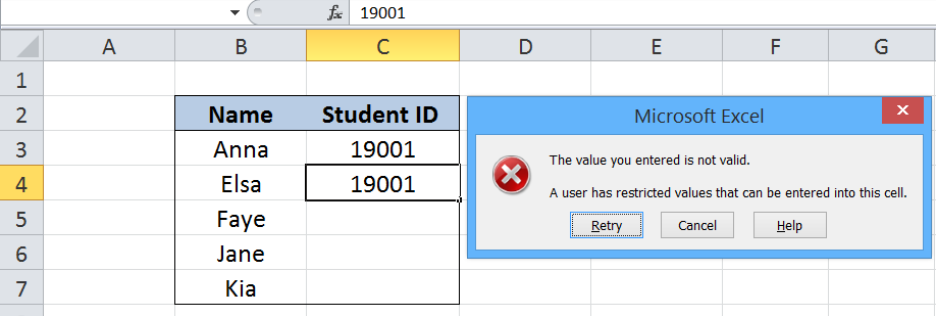 Figure 7. ID “19001” entered twice and restricted by Data Validation
This time, the COUNTIF formula returns the count of 2 for “19001”, which exists in both cells C3 and C4. Hence, Data Validation fails and restricts the input of “19001” into cell C4. For restricted values, Excel shows a default warning message that says:
“The value you entered is not valid. A user has restricted values that can be entered into this cell.”
We are then presented with three options: Retry, Cancel or seek Help.
Data Validation is very accurate in allowing only the values as specified in the formula or validation criteria. See below table that is filled up with Student IDs unique to each student, as allowed by Data Validation.
 Figure 8. Output: Data validation unique values only
Most of the time, the problem you will need to solve will be more complex than a simple application of a formula or function. If you want to save hours of research and frustration, try our live Excelchat service! Our Excel Experts are available 24/7 to answer any Excel question you may have. We guarantee a connection within 30 seconds and a customized solution within 20 minutes.


Leave a Comment