

Excel allows us to convert a table to a range without losing the table style. A range means a regular set of data on the worksheet. This tutorial will walk all levels of Excel users through the easy steps of converting a table to a range while keeping all table style formatting.
 Figure 1 – Converted table to range
Data to Convert Table to Range
Before we can convert the table to a normal range, we must have created it. The table is created by clicking any cell within the range, clicking on the Insert tab, and clicking on Table.
 Figure 2 – Data to convert the table to a normal range
How to Convert a Table to a Range
We will do the following to convert table to a range.
- We will click any cell on the table
- We will go to the Design tab. We will click Convert to Range in the Tools group. On a Mac, we will do this on the Table tab.
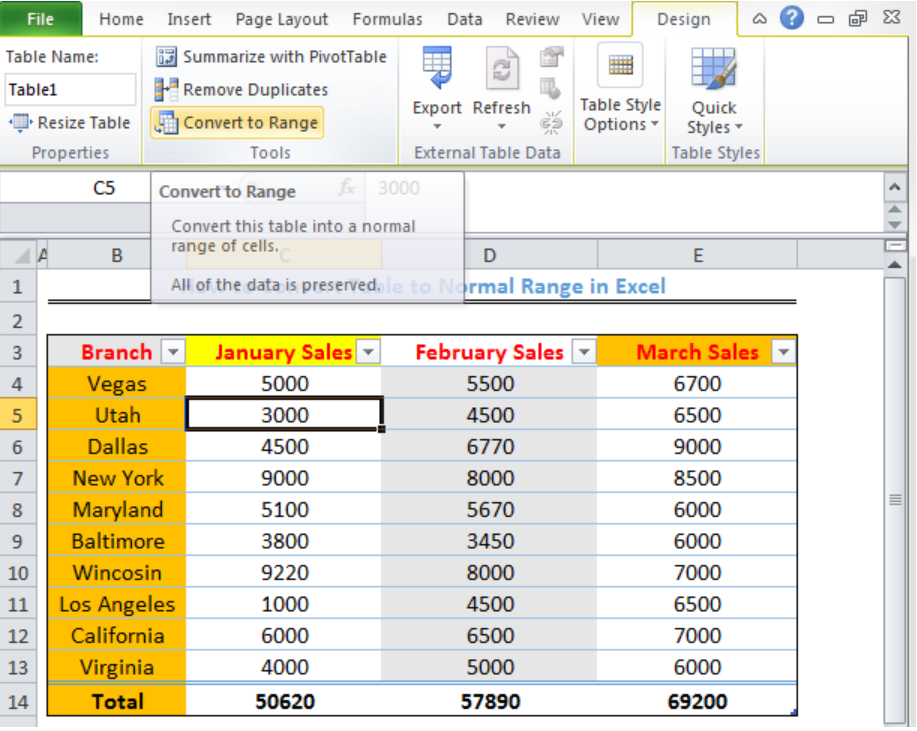 Figure 3 – Click Convert to Range
- We will receive a prompt. We will click Yes
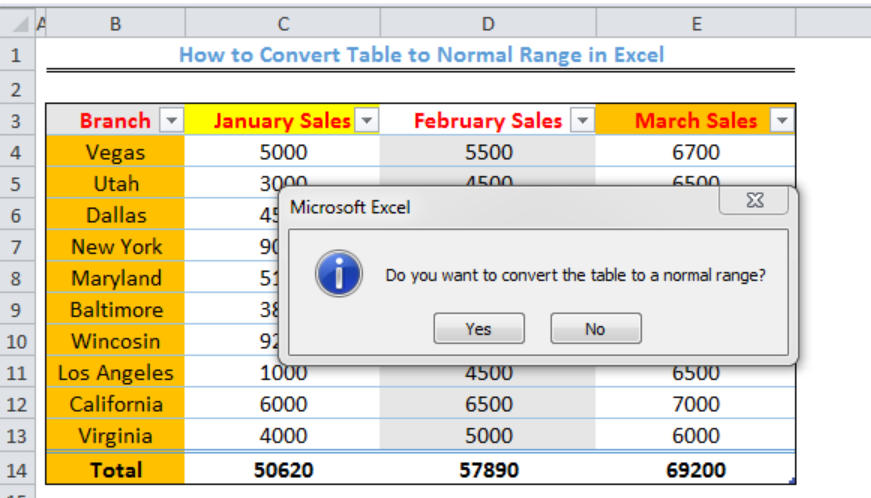 Figure 4 – Click Yes
- We will notice that the arrows on Row 3 will disappear
 Figure 5 – Converted table to range
Alternative Method to Convert a Table to a Range
- We will right-click on the table
- We will click Table
- We will click Convert to Range
Note
After we have converted to a normal range, the table functionalities such as the row headers and sort and filter arrows become unavailable.
Instant Connection to an Expert through our Excelchat Service
Most of the time, the problem you will need to solve will be more complex than a simple application of a formula or function. If you want to save hours of research and frustration, try our live Excelchat service! Our Excel Experts are available 24/7 to answer any Excel question you may have. We guarantee a connection within 30 seconds and a customized solution within 20 minutes.


Leave a Comment