While working with Excel, we can add digital signatures to our file as proof that we have created or approved the document, or that it has not been modified upon sending. A digital signature also adds protection to the file to prevent further editing by other users.
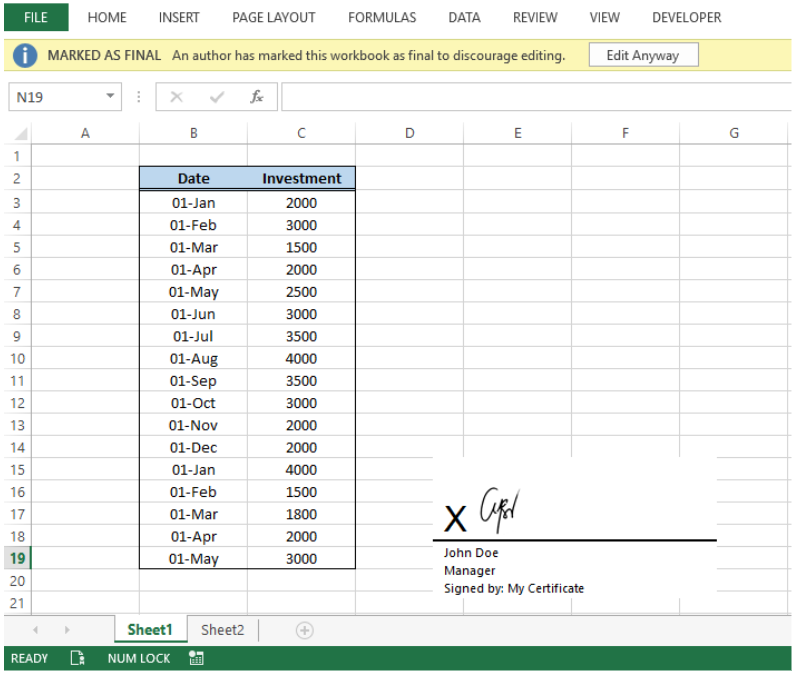 Figure 1. Final result: Digital signature
How to insert a digital signature
In order to sign documents digitally, we can use a digital certificate. Follow these steps:
- Click File tab > Info > Protect Workbook > Add a Digital Signature
 Figure 2. Protect Workbook menu options
The Sign dialog box will appear, stating that the signature we will be adding won’t be visible within the worksheet.
- Select the Commitment Type and enter the purpose for signing the document in the text box
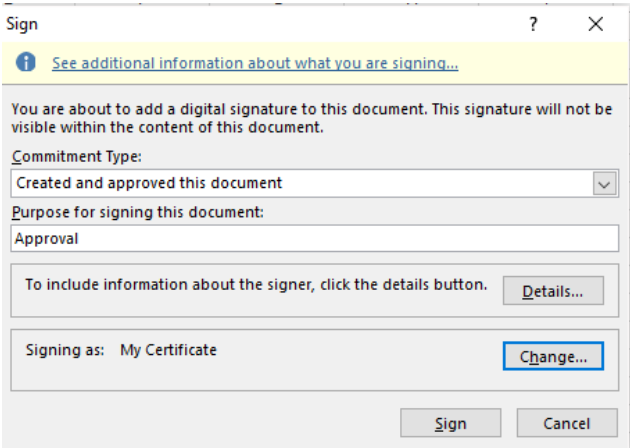 Figure 3. Sign dialog box
- We can click Details to add some additional information as shown below
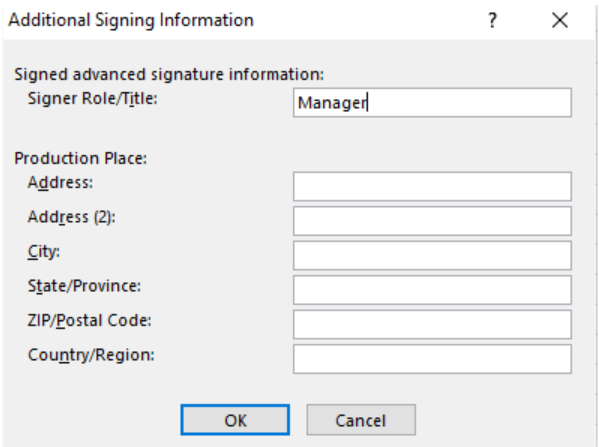 Figure 4. Entering additional information
- We can also click Change if we want to use a different digital certificate, or to view the certificate properties.
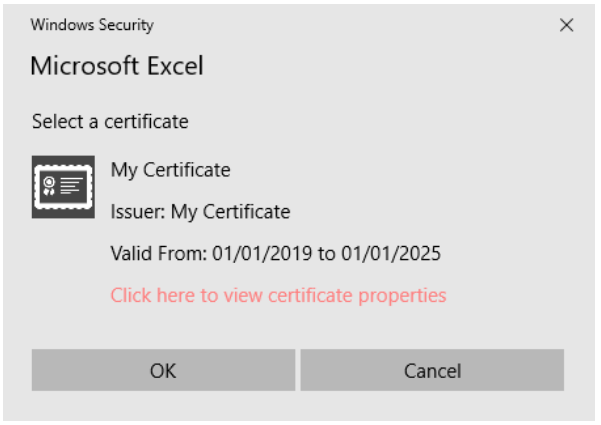 Figure 5. Windows Security preview
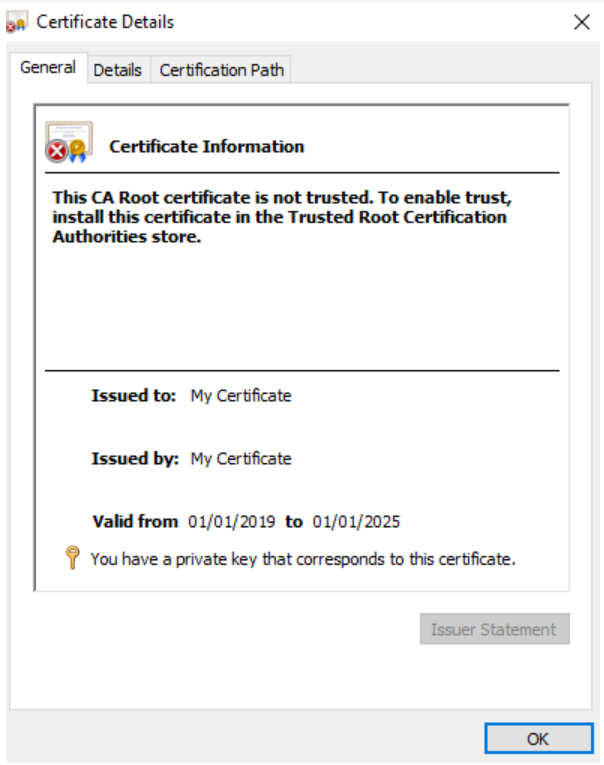 Figure 6. Certificate details
- Click OK. A Signature Confirmation will be displayed, with a warning that the signature becomes invalid once the document is changed.
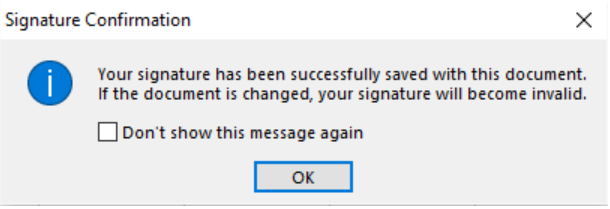 Figure 7. Signature Confirmation message
- Click OK.
We have now successfully added a digital signature to our file, as indicated in File tab > Info.
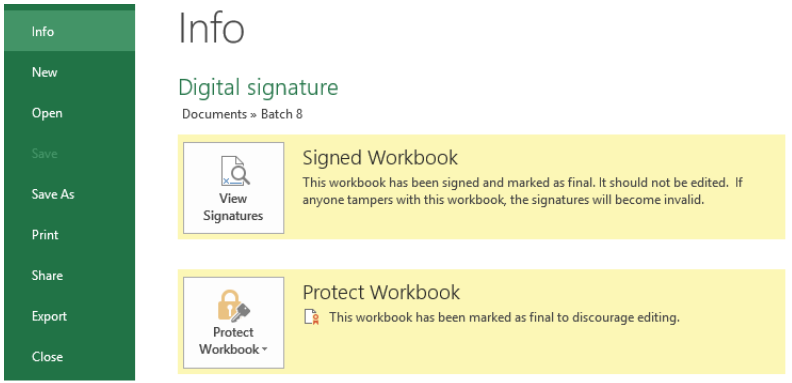 Figure 8. Info window with a digital signature
Another indication of a digital signature is the symbol displayed in the status bar at the bottom of the page.
![]() Figure 9. Digital Signature icon on Status Bar
Figure 9. Digital Signature icon on Status Bar
When we double-click the icon, it will launch the Signatures dialog box where we can view the signature details or remove the signature.
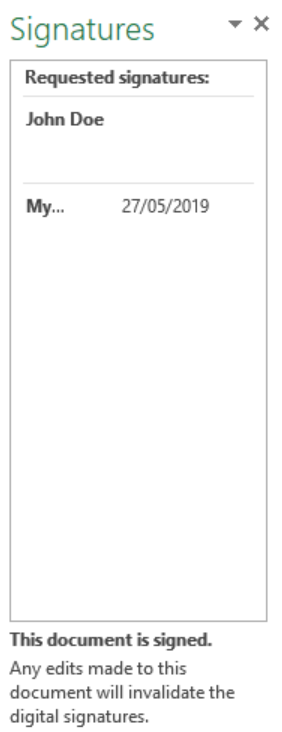 Figure 10. Signatures dialog box
A warning will also be displayed at the top of the window, where the file is Marked as Final.
 Figure 11. Marked as Final warning message
When we click Edit Anyway, Excel will prompt us that editing will remove the signatures.
 Figure 12. Message prompt upon editing
 Figure 13. Signature Removed message prompt
Add a visible signature
Aside from a digital certificate, we can also use the Insert tool to add a visible digital signature. Follow these steps:
- Click Insert tab
- In the Text group, select Add a Signature Line button
- Select Microsoft Office Signature Line in the drop-down menu
 Figure 14. Add a Signature Line option
- The Signature Setup dialog box will appear. Fill out any or all the textboxes as deemed necessary:
- Suggested signer
- Suggested signer’s title
- Suggested signer’s e-mail address
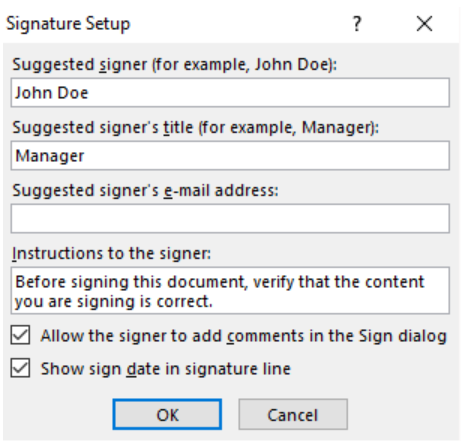 Figure 15. Signature Set-up dialog box
- We also have the option to select the check boxes for:
-
- Allow the signer to add comments in the Sign dialog
- Show sign date in signature line
- Click OK. The signature line will be added in our worksheet, showing the name and title below a line and a large X.
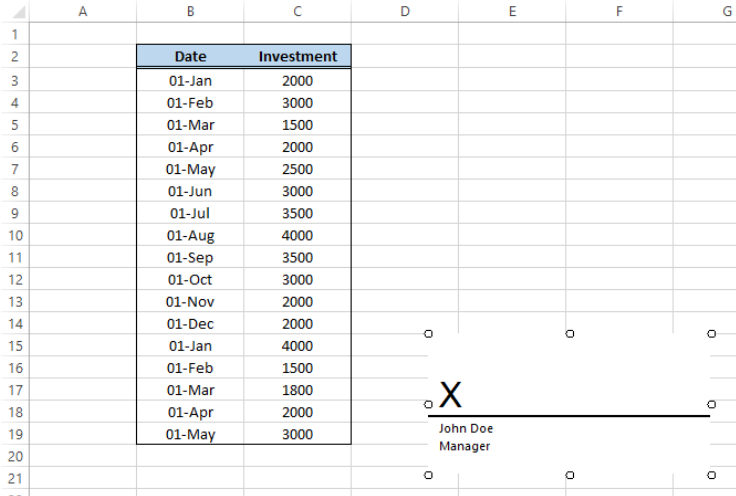 Figure 16. Output: Signature line added
How to sign
In order to affix our signature, we follow these steps:
- Double click on the signature line. The Sign dialog box will appear.
- Enter the name in the text box. Example: “John Doe”
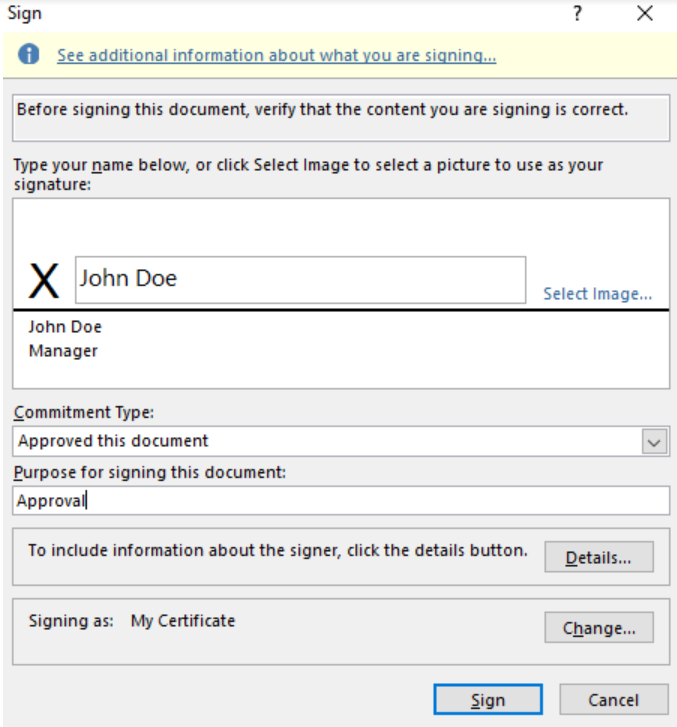 Figure 17. Sign dialog box
- Click Select Image and browse for the picture that serves as the electronic signature
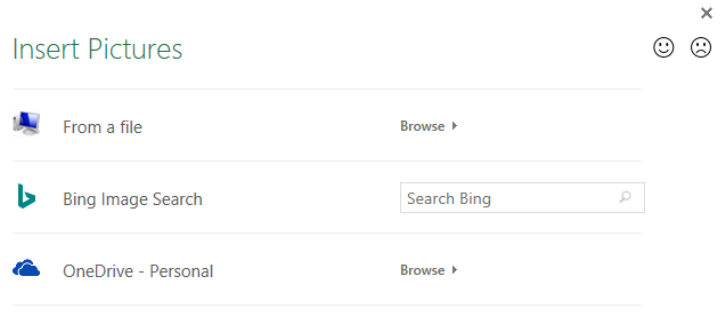 Figure 18. Insert Pictures window
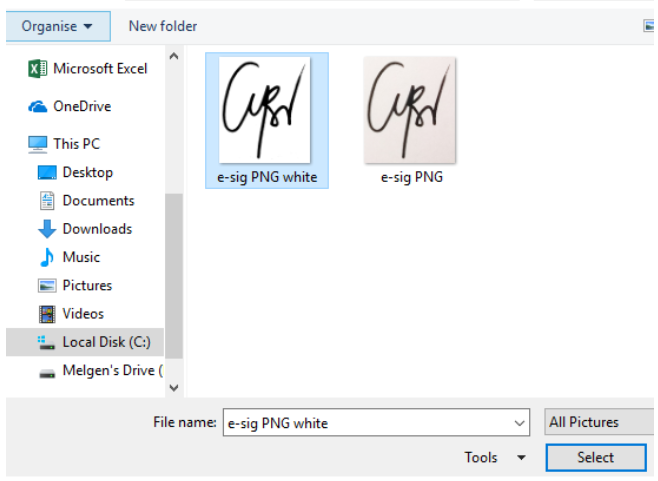 Figure 19. Selecting the image to insert
- Once we’ve added the image for the signature, the text box will display a preview of the digital signature. Next we select the Commitment Type and indicate the purpose for signing the document, example: “Approval”.
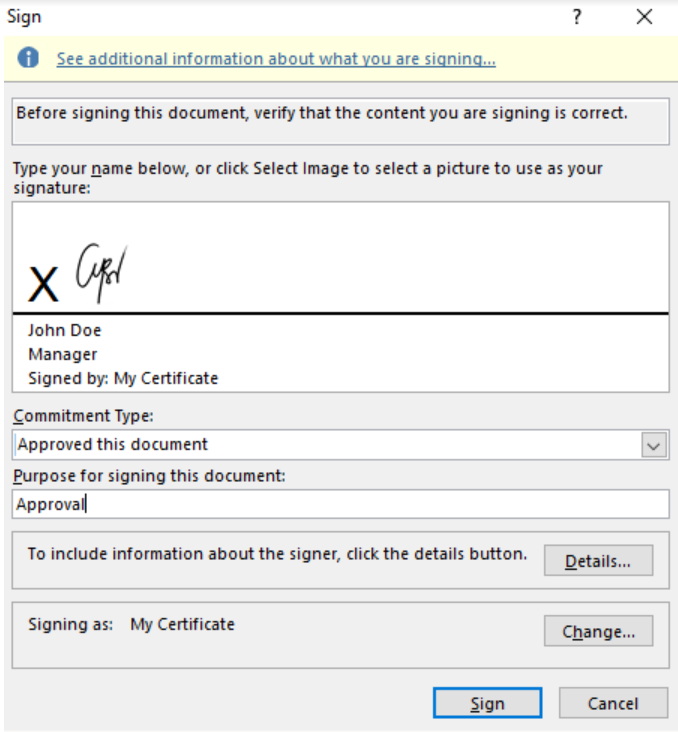 Figure 20. Digital Signature Preview
- Click Sign. A Signature Confirmation will appear.
 Figure 21. Signature Confirmation message prompt
We have now successfully added a visible digital signature to our file.
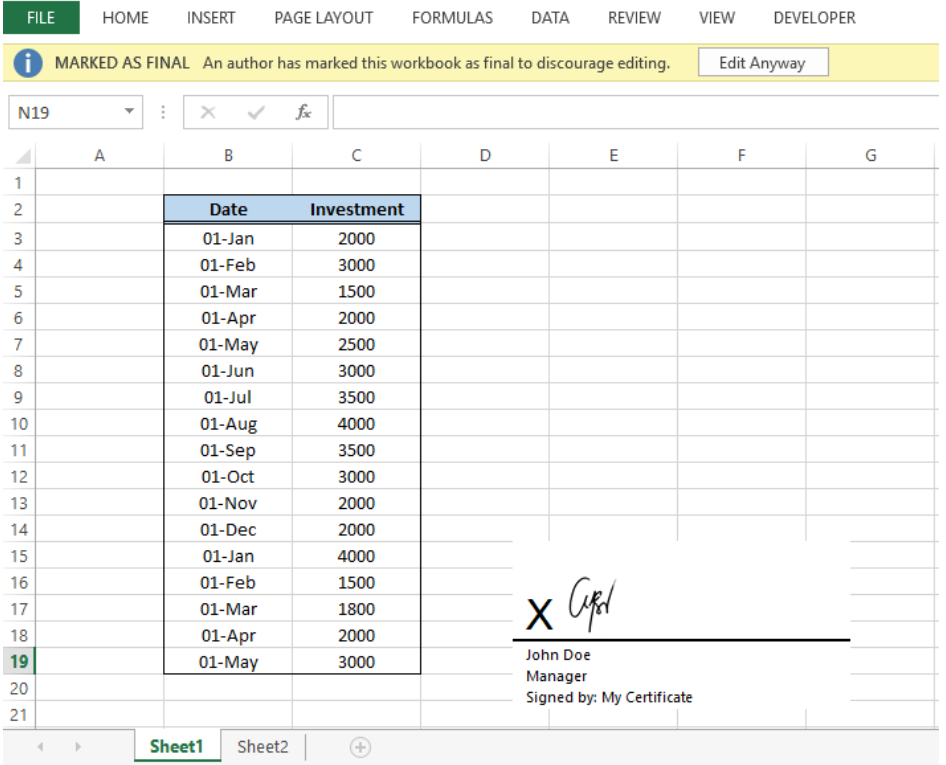 Figure 22. Output: Add a visible digital signature
Instant Connection to an Excel Expert
Most of the time, the problem you will need to solve will be more complex than a simple application of a formula or function. If you want to save hours of research and frustration, try our live Excelchat service! Our Excel Experts are available 24/7 to answer any Excel question you may have. We guarantee a connection within 30 seconds and a customized solution within 20 minutes.


Leave a Comment