

We can use the Pivot Table Wizard to create a Pivot Table. The Pivot Table helps us to analyze, summarize and calculate data that enables us to visualize trends, comparisons, and patterns in our data. The steps below will walk through the process of using the Pivot Table Wizard.
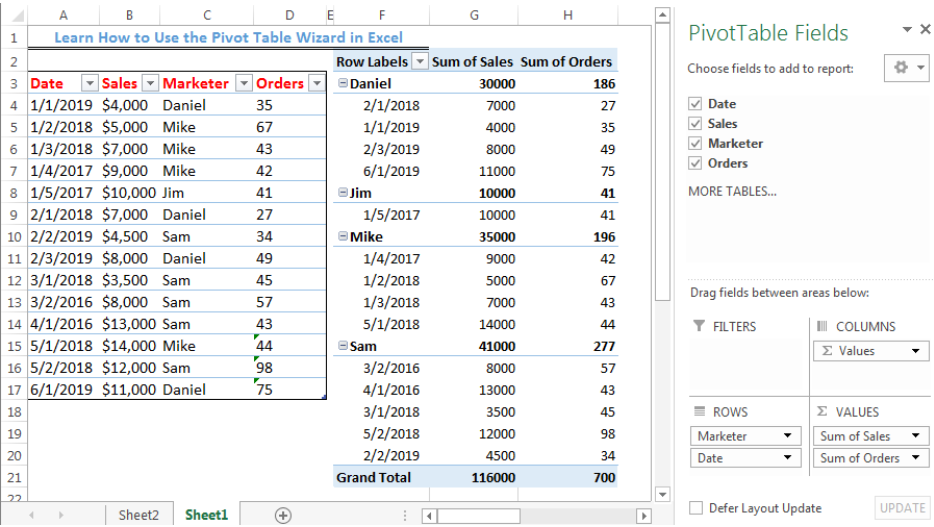 Figure 1- How to Use the Pivot Table Wizard in Excel
Installing the Pivot Table Wizard Add-In
- We can click here to install the Pivot Table Add-In
Setting up the Data
- We will create a Pivot Table with the Data in figure 2
 Figure 2 – Setting up the Data
Putting the Data into a Table
- We will click on anywhere on the data
- We will click on the Insert tab and click on Table
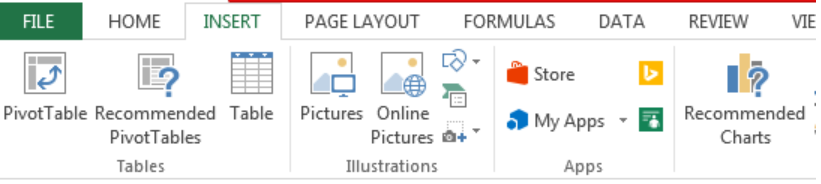 Figure 3- Clicking on Table
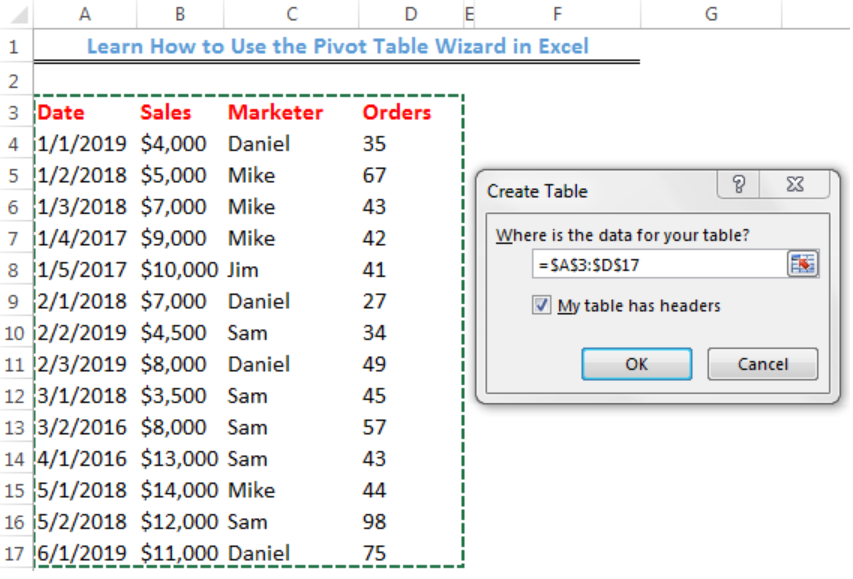 Figure 4- Creating the Data Table
- We will click OK to create the Table
 Figure 5- Created Data Table
- We will click on the Table Name Box below File to name the table as Sales_Data
Creating a Pivot Table with the Pivot Table Wizard in Excel
- We will click on Menus and click the drop-down arrow on Data
 Figure 6- Clicking the Data tab
- On the drop-down, we will select Pivot Table, and then, Pivot Table and Pivot Chart Wizard
 Figure 7- Pivot Table and Pivot Chart Wizard Dialog box Step 1
- We will click on Next since our data is on the excel sheet and we are interested in creating a Pivot Table
 Figure 8- Pivot Table and Pivot Chart Wizard Dialog box Step 2
- Our range has been selected, so, we will click Next
 Figure 9- Pivot Table and Pivot Chart Wizard Dialog box Step 3
- We will create the Pivot Table on the current worksheet, hence, we will check Existing worksheet and specify the location where the Pivot Table will start as F2
- We will click Finish
- We will select and drag the fields to the positions we want as shown in Figure 10
 Figure 10- Created Pivot Table
Instant Connection to an Expert through our Excelchat Service
Most of the time, the problem you will need to solve will be more complex than a simple application of a formula or function. If you want to save hours of research and frustration, try our live Excelchat service! Our Excel Experts are available 24/7 to answer any Excel question you may have. We guarantee a connection within 30 seconds and a customized solution within 20 minutes.


Leave a Comment