

We can secure or protect our excel workbooks in many ways. This is very important if we have to move or share our data so that it retains its structure without modifications. We can equally password protect our Excel file to ensure that we have adequate control over the data. In this tutorial, we will explore easy ways to protect and password protect an Excel file.
 Figure 1 – How to create a password for Excel file
How to Protect a Workbook or Excel file
This is called workbook-level protection. In this case, adding this protection restricts other users from opening the file.
- First, we will make sure that all the changes in our Excel file have been saved. We can click CTRL + S to save the file.
- We will go to the File Tab and select Protect Workbook in the Info section.
 Figure 2 – How to password protect an Excel workbook
- Next, we will choose Encrypt with password from the drop-down menu
 Figure 3 – How to password protect a spreadsheet
- In the Encrypt Document dialog box, we will enter the password we wish to use in password protecting workbook and select OK
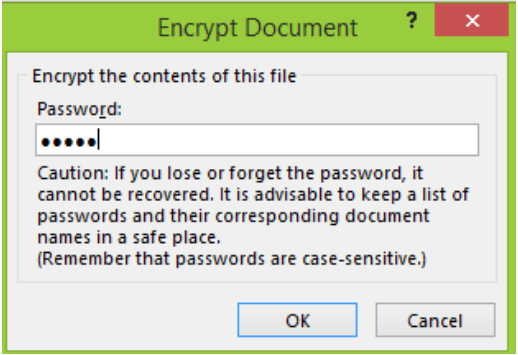 Figure 4 – How to password protect an Excel file
- We will receive a prompt to re-enter the password and then click OK
 Figure 5 – How to add a password to an Excel file
- When we save and close file, anyone who tries opening it will receive the prompt below requesting for the password.
 Figure 6 – Protecting workbook
- To remove the password, we will go back to info, select Password Workbook followed by Encrypt with Password
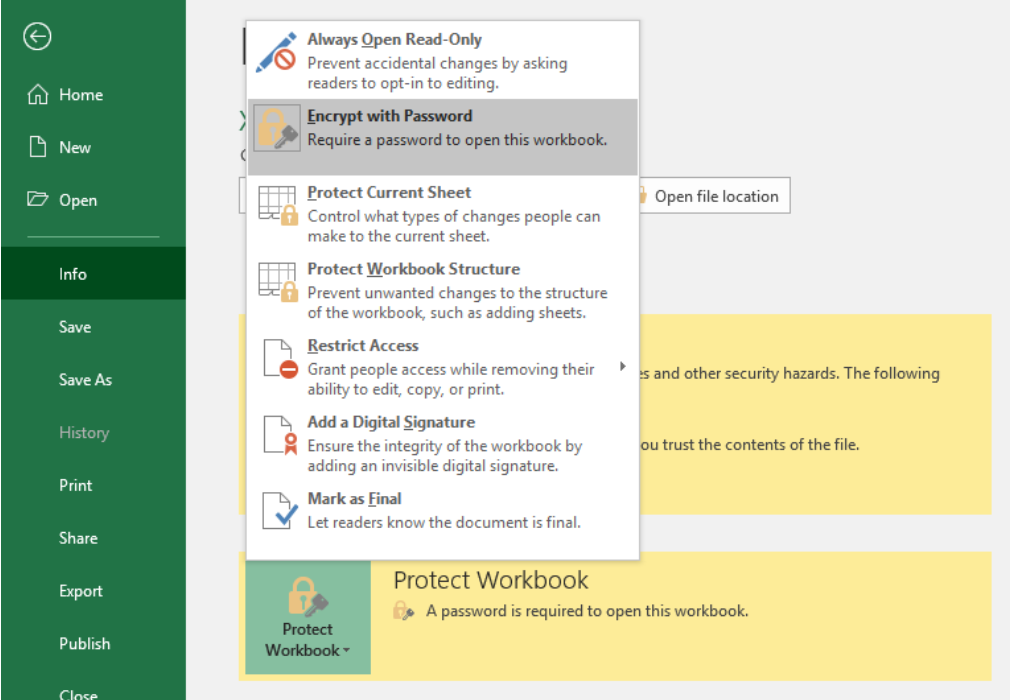 Figure 7 – How to unprotect workbook
- Next, we will clear out the password and click OK. Our workbook is now successfully unprotected.
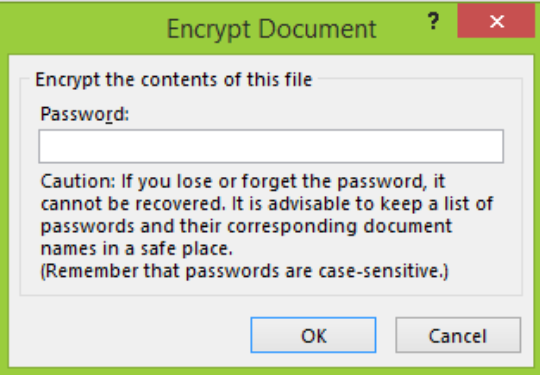 Figure 8 – Unprotect workbook
How to password protect excel files
We can equally use different workbook-level protection. This password protection will restrict all users from moving, hiding, renaming, or deleting any worksheets in a workbook file.
To password protect our workbook,
- We will go to the Review Tab in our workbook and select Protect Workbook from the Changes group
 Figure 9 – How to add a password to an Excel file
- In the Protect Structure and Windows dialog box, we will check the box next to Structure.
- We can also enter a password in the Password text box. Notice that adding a password at this level is optional.
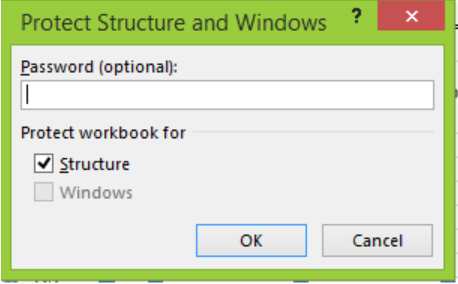 Figure 10 – How to protect workbook structure
- We will add a password and click OK
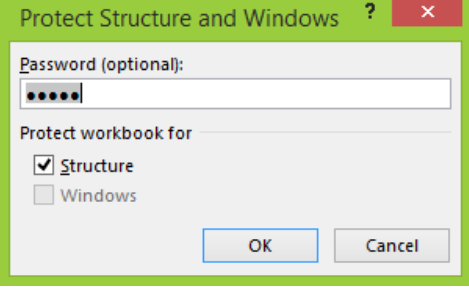 Figure 11 – How to password protect a spreadsheet
- We will be prompted to re-enter the password
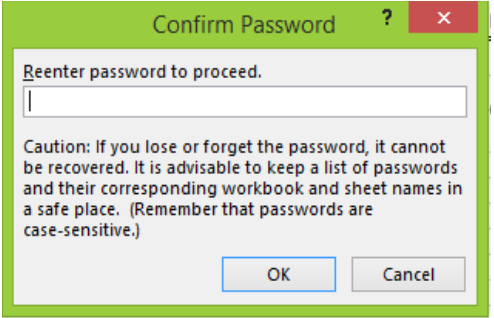 Figure 12 – Protecting sheets
However, this doesn’t restrict users from opening the file. Therefore, when we want all-around protection, we can combine this method and the previous password protect workbook technique together
Instant Connection to an Excel Expert
Most of the time, the problem you will need to solve will be more complex than a simple application of a formula or function. If you want to save hours of research and frustration, try our live Excelchat service! Our Excel Experts are available 24/7 to answer any Excel question you may have. We guarantee a connection within 30 seconds and a customized solution within 20 minutes.


Leave a Comment