

We can move columns and rows by following simple steps. This tutorial will guide all levels of Excel users on how to move columns and rows.
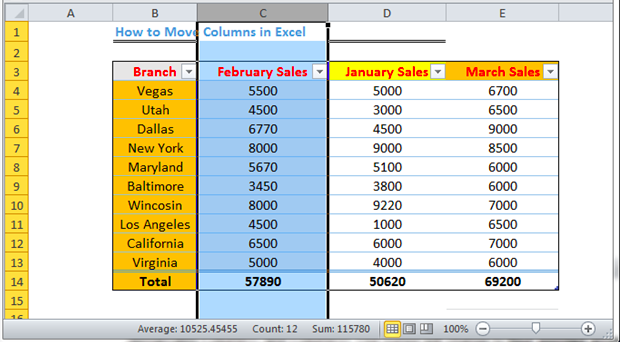 Figure 1 – How to move columns
How to Move Columns
- We can move columns in Excel by following the steps below.
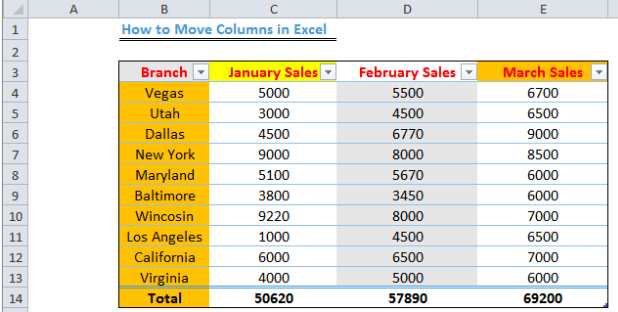 Figure 2 – Data to move column
- We will take our cursor to click on the Column alphabet we want to move. In this case, we will move Column D to come after Branch (Column B). We will see that the column is highlighted once we click it
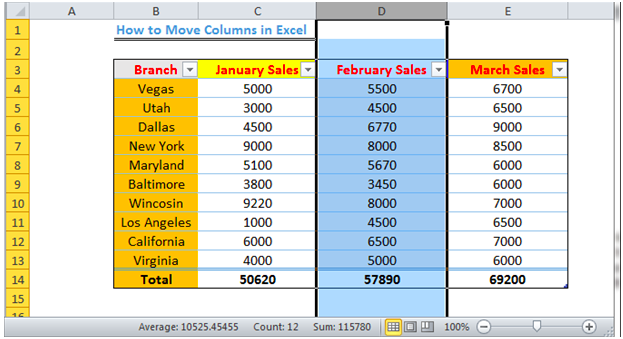 Figure 3 – Rearrange columns
- With the column still highlighted, we will move our cursor to the line that demarcates Column C and Column D. Our cursor will change to four pointed arrows once we are on the demarcating line
- We will hold the SHIFT key, LEFT-CLICK and drag the column to the demarcating line of Column B and Column C
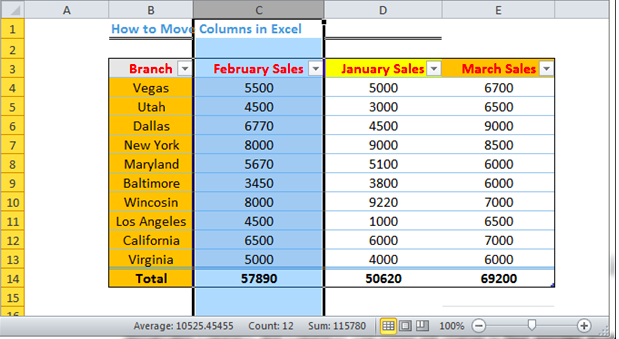 Figure 4 – Move column
Note – We must hold the shift key, else, Excel we ask if we want to replace the cell content.
How to Move Rows
- We can move rows by following the steps below
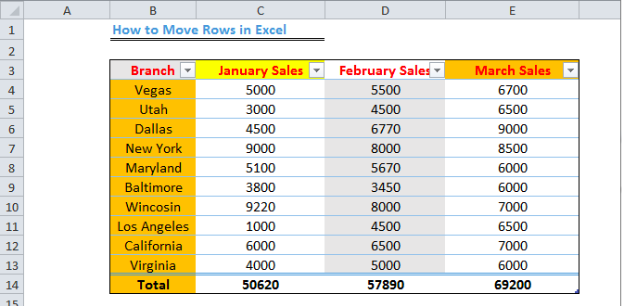 Figure 5 – How to move a row
- We will take our cursor to click on the Row number we want to move. In this case, we will move Row 12 to Row 9. We will see that the Row is highlighted once we click it
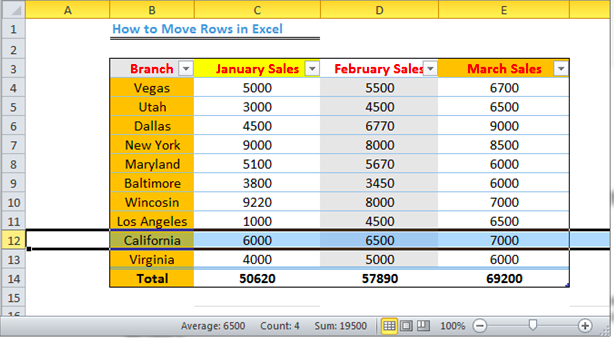 Figure 6 – Moving rows
- We will right-click and select cut. With the Row number still highlighted, we will move our cursor to Row 9 and click on it
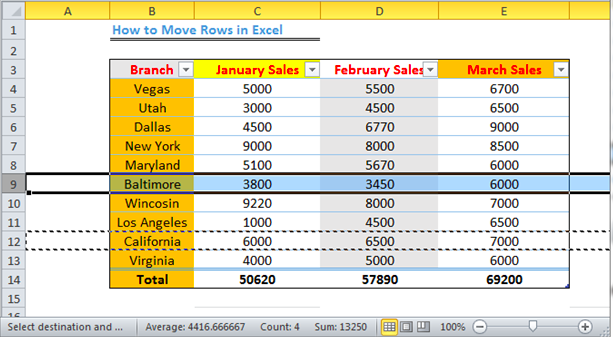 Figure 7 – Move rows
- We will right-click and select Insert Cut Cells
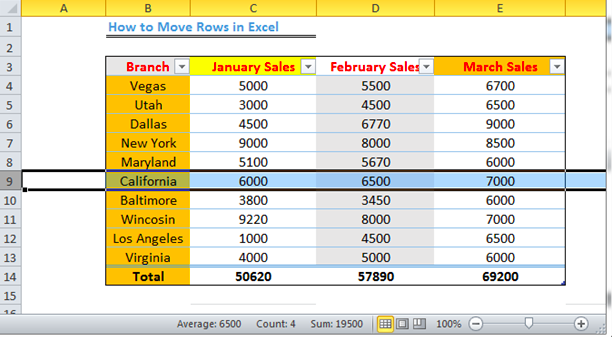 Figure 8 – How to rearrange rows
Instant Connection to an Excel Expert
Most of the time, the problem you will need to solve will be more complex than a simple application of a formula or function. If you want to save hours of research and frustration, try our live Excelchat service! Our Excel Experts are available 24/7 to answer any Excel question you may have. We guarantee a connection within 30 seconds and a customized solution within 20 minutes.


Leave a Comment