

Excel provides a variety of built-in table styles with various formatting options of fonts, background colors, borders, banded rows to manage and improve the look of data. There may be a time where we do not require applied table formatting. Therefore, we need to learn how to remove table formatting.
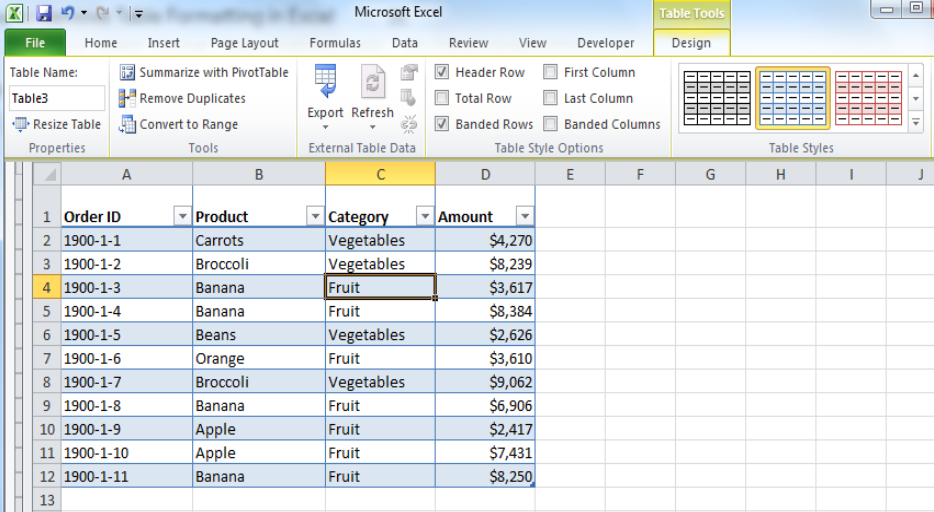 Figure 1. Remove Table Formatting
Removing Table Formatting
Table formatting is applied to get available benefits of creating catchy view along with additional features like integrated sorting and filtering of the data, dynamic table referencing required in data handling. However, in some cases, we may need to remove table formatting to manipulate the data as per own requirement. There are the following two methods to perform this task;
Clear Table Format
Sometimes, we only need to delete only the formatting style of the table such as background color, shade, border, banded rows but we want to keep the additional features of integrated filtering and sorting and table referencing intact for data manipulation. In this case, we need to perform unformat table by clearing the table formatting in the following steps;
- Place cursor in any cell of the table
- Go to Design tab > In Table Styles section click on the More drop-down arrow
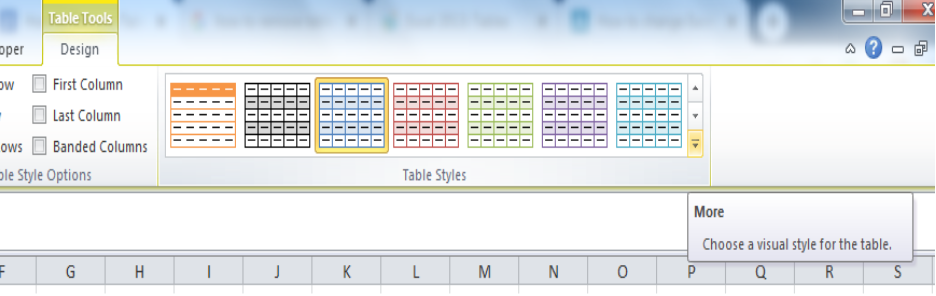 Figure 2. Selecting More Button on the Design tab
- At the end of the Table Styles window, select the Clear button
![]() Figure 3. Selecting Clear Button
Figure 3. Selecting Clear Button
After selecting the Clear button, remove table formatting only but other features remain available with the table having the following view;
![]() Figure 4. Table View After Clearing Table Formatting
Figure 4. Table View After Clearing Table Formatting
Convert to Range
As we are aware that table formatting carries additional features like integrated sorting and filtering, table referencing, etc. along with formatting styles. We may need to keep the formatting styles of colors, shades, banded rows and remove additional features only. We can achieve this by converting the table into a normal range of cells in the following way;
- Select any cell in a formatted table
- Click on Design tab and select Convert to Range in Tools section.
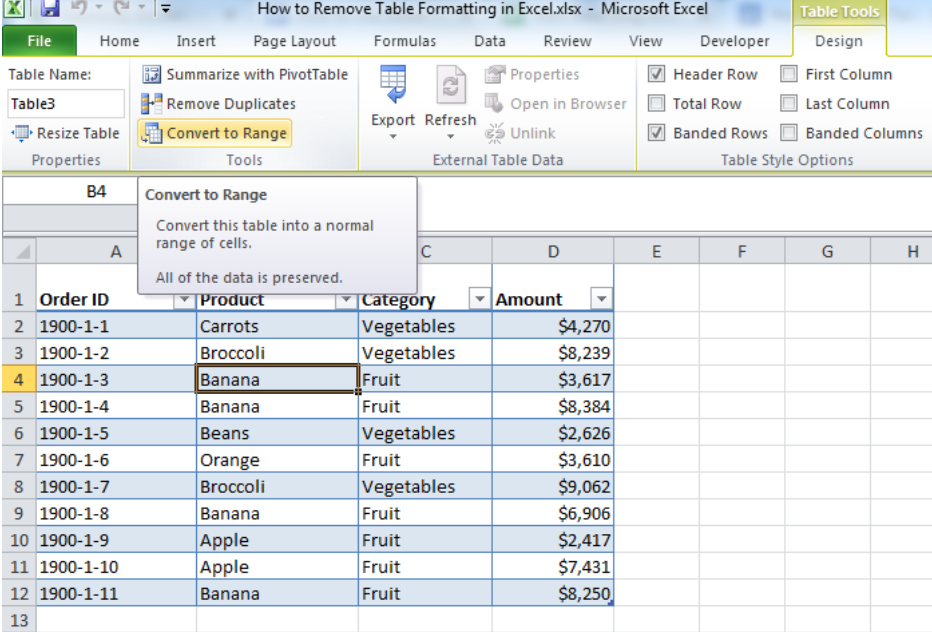 Figure 5. Converting Table to Range
- Alternately, right-click in the formatted table, go to Table and select Convert to Range option.
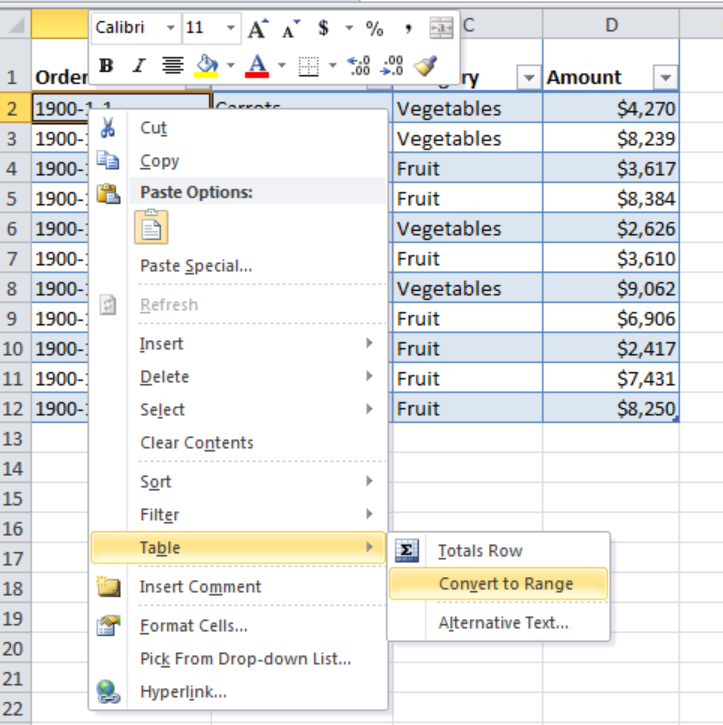 Figure 6. Right-Click For Table to Range
- Click Yes button on the dialog box to convert Table into a range of cells.
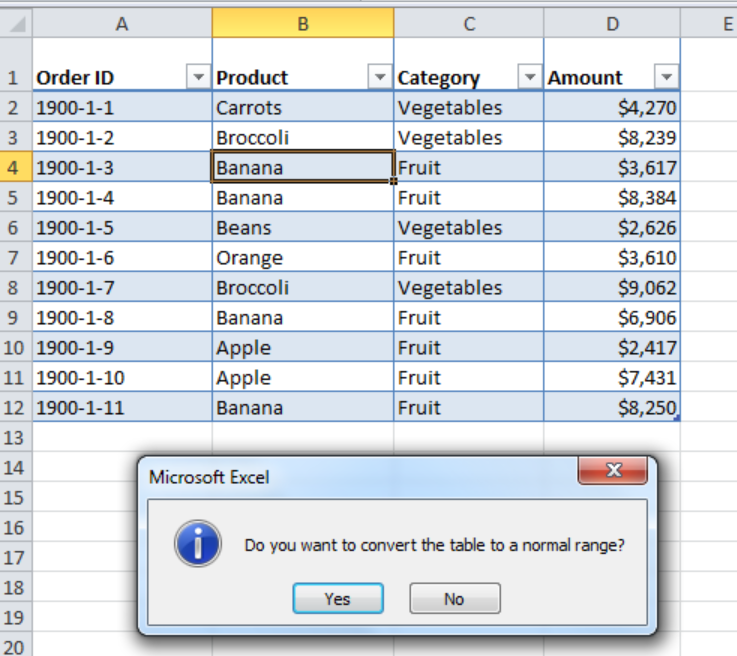 Figure 7. Confirming Conversion of Table to Range
- Table converts into a normal range of cells, keeping the formatting styles without additional features of table formatting.
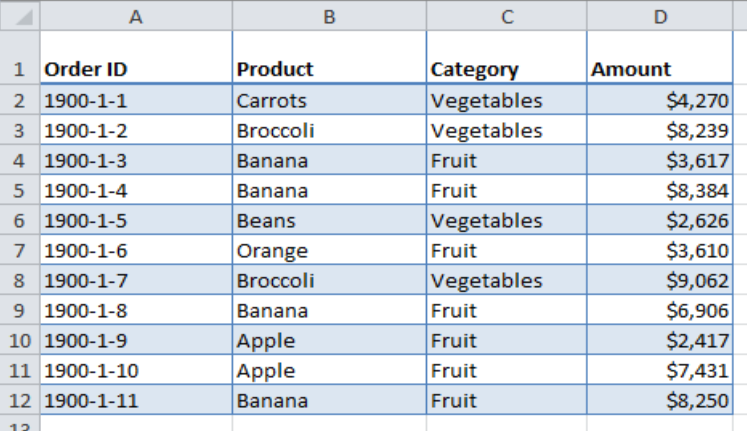 Figure 8. View of Normal Range of Cells
Instant Connection to an Expert through our Excelchat Service
Most of the time, the problem you will need to solve will be more complex than a simple application of a formula or function. If you want to save hours of research and frustration, try our live Excelchat service! Our Excel Experts are available 24/7 to answer any Excel question you may have. We guarantee a connection within 30 seconds and a customized solution within 20 minutes.


Leave a Comment