While an Excel file can be saved in several other types such as a web page, text, CSV and PDF, it cannot be directly saved as an image. We can use online converters to convert Excel to JPG or JPG to Excel. Those tools are generally easy to use where we only have to drag and drop our file, click the preferred file type and then convert.
However, as we are not online all the time, it is very useful to learn how to convert Excel to JPG in our desktop. In this article, we will learn the following three methods:
- Snipping Tool
- Print Screen
- Copy as Picture
Convert to JPG using Snipping Tool
The Snipping Tool is a great way to capture and save an image.
 Figure 1. Snipping Tool dialog box
It has four options for the snip mode: Free-form, Rectangular, Window and Full-screen.
 Figure 2. Snip Modes
How to snip?
- Click the Excel file then open the Snipping tool
- Select a snip mode (most widely used is Rectangular Snip)
- Click the New button. The cursor will turn into a big plus “+” sign
- Select the part of the Excel file that we want to capture
The image will automatically appear in the Snipping Tool preview pane. Click File > Save As or press Ctrl + S.
 Figure 3. Saving image in Snipping Tool
- In the Save As dialog box, enter the following:
- Enter “Snip” or “Snip.jpg” in the File name text box. Either way, the image will be saved in the file type we choose
- Choose JPEG from the drop-down menu in Save as type:
 Figure 4. Save As dialog box in Snipping Tool
- Click Save. The image will be saved in JPG as shown below:
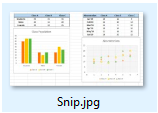 Figure 5. Output: Convert Excel to JPG using Snipping Tool
Convert to JPG using Print Screen
The Print Screen tool on the keyboard is super easy to use. It captures and copies everything on screen. Here are the steps:
- Ensure that all the data we want to save as JPG is displayed on the screen. We can zoom in or out according to our preference.
- Press the Print Screen or PrtSc key on the keyboard
- Open Microsoft Paint or any graphics editor of choice. Press Ctrl + V to paste the image
 Figure 6. Saving image in Paint
- Press Ctrl + S to save the image
- In the Save As dialog box, enter the following:
- Enter “Image1” in the File name text box
- Choose JPEG from the drop-down menu in Save as type:
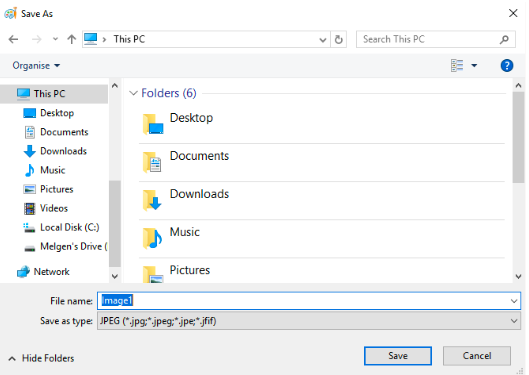 Figure 7. Save As dialog box in Paint
- Click Save. The image file from Excel will now be saved as JPG file.
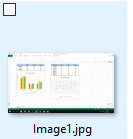 Figure 8. Output: Convert Excel to JPG using Print Screen
Note that Print Screen will include everything that is visible on the screen. This includes the ribbon, status bar and menu buttons. We can choose to minimize the ribbon. However, the other buttons and options on the screen will still be displayed.
Copy as Picture
Another method to convert Excel to JPG is by the copy/paste method. Here are the steps:
- Select the chart or table that we want to save.
- Click Home tab > Copy button > Copy as Picture
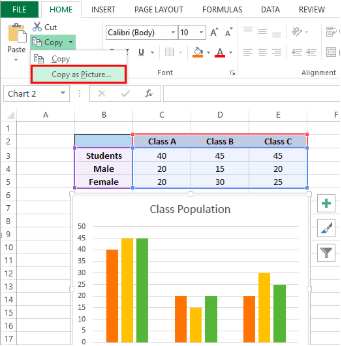 Figure 9. Copy as Picture option
- We will be asked to select the :
- Appearance – As shown on screen or As shown when printed
- Format – Picture or Bitmap
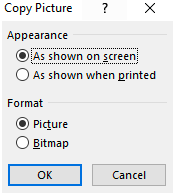 Figure 10. Copy Picture dialog box
- Click OK then open Microsoft Paint or any graphics editor
- Press Ctrl + V to paste the image
- Press Ctrl + S and save the image as JPG
Instant Connection to an Excel Expert
Most of the time, the problem you will need to solve will be more complex than a simple application of a formula or function. If you want to save hours of research and frustration, try our live Excelchat service! Our Excel Experts are available 24/7 to answer any Excel question you may have. We guarantee a connection within 30 seconds and a customized solution within 20 minutes.


Leave a Comment