

To insert checkbox we can use the Check Box button under Developer tab. The checkbox can be linked to Excel cell to create a dynamic formulas depending on the value in the checkbox.
This step by step tutorial will assist all levels of Excel users in learning how to add a checkbox.
Insert a Checkbox
To insert a checkbox, we should have Developer tab in Toolbar. If we don’t have this tab in quick access Toolbar we should follow several steps:
- Go to File, Options and choose Customize Ribbon
- In Main Tabs check the Developer box
- Click OK and Developer tab will display in Toolbar.
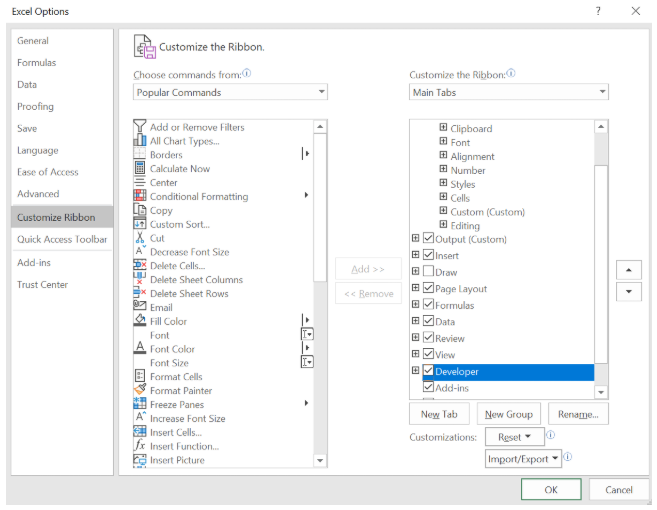 Figure 1. How to add Developer tab
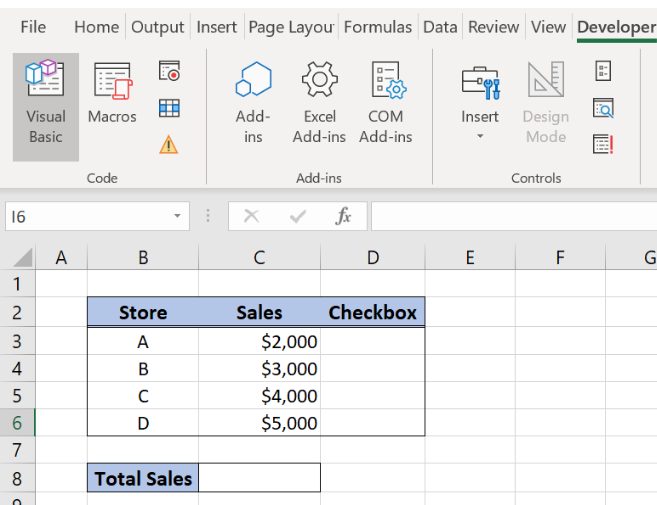 Figure 2. Developer tab in Quick access Toolbar
Now we can insert the checkbox. In our example we want to add the checkbox in each cell in column Checkbox. When the checkbox is selected, sales values from the respective store will be included in Total Sales amount.
To put a checkbox in the cells, we should:
- Select Developer tab and choose Insert tab and Check Box
 Figure 3. How to add a checkbox
- Create a checkbox
- Right-click on the checkbox and choose Edit Text
- Delete the text from checkbox and move it to the center of the cell
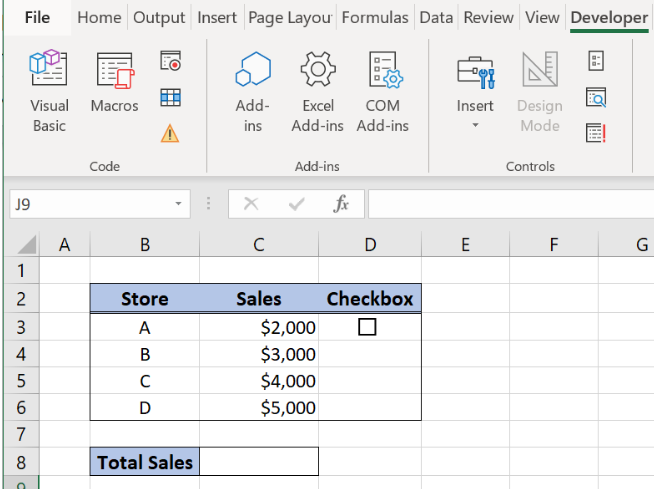 Figure 4. Edit and insert checkbox
- Drag the checkbox down to the other cells in the column by clicking and dragging the little “+” icon at the bottom-right of the cell. That is shortest way to create the multiple checkboxes.
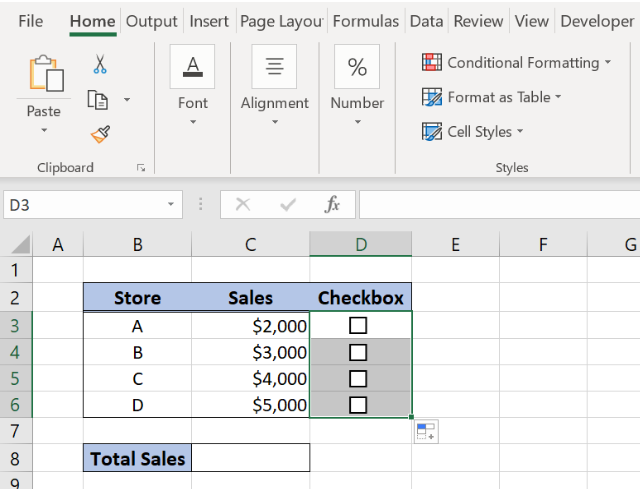 Figure 5. Insert multiple checkbox
- To check a box, left-click on the box and it will be selected
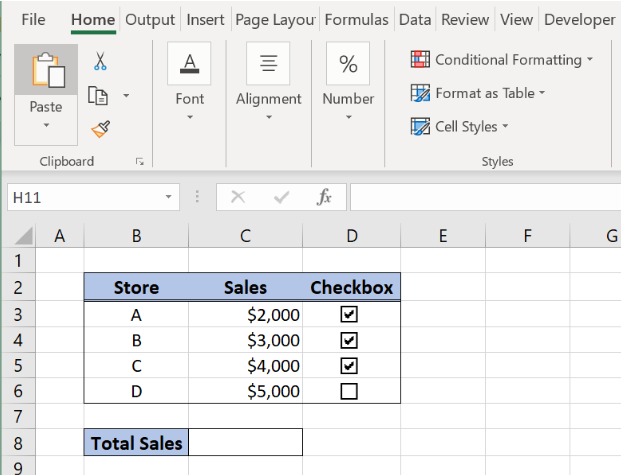 Figure 6. How to check a box
How to Delete a Checkbox
To remove a checkbox, select the checkbox by right-mouse click and press Delete button on Keyboard.
If we want to delete a multiple checkbox we should:
- Select all checkboxes by right-clicking on the each box and holding Ctrl button on the keyboard
- Press Delete button on the keyboard and checkboxes will disappear.
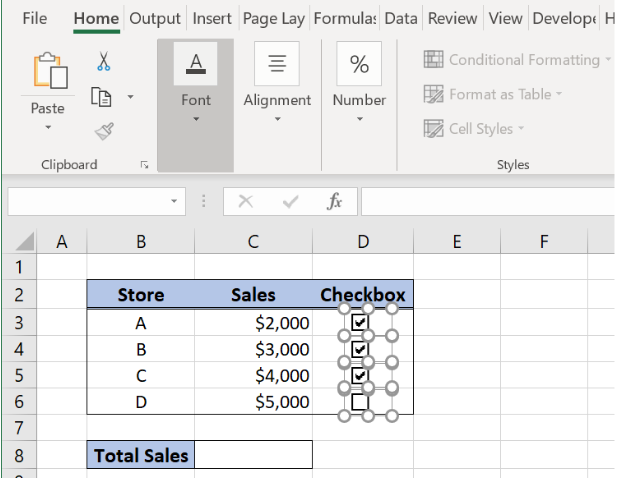 Figure 7. Delete checkbox
We can Go to Special Excel option to delete all checkbox Sheet:
- Press Ctrl+g on Keyboard
- Go to Special and choose Objects
- Now all checkboxes are selected
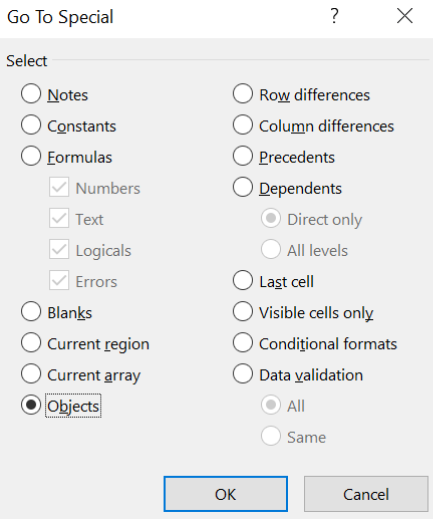 Figure 8. Select all checkboxes in Sheet
- Press Delete button on the keyboard to delete all checkboxes in the Sheet
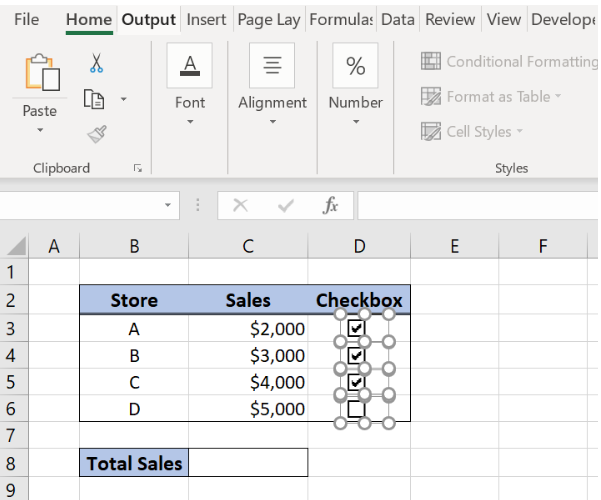 Figure 9. Delete all checkboxes in Sheet
How to Link a Checkbox with a Cell
The checkbox can be linked to the cell. Linked cell will have a value of TRUE if the checkbox is checked and a value of FALSE if it’s not. Using this feature we can connect the checkbox with different functions and create dynamic reports.
To link a checkbox with the cell we should:
- Right click on the checkbox and choose Format Control
- Under Control tab in the Cell Link, select the cell that will be linked to checkbox
- Repeat steps above until all checkboxes are linked to the cells
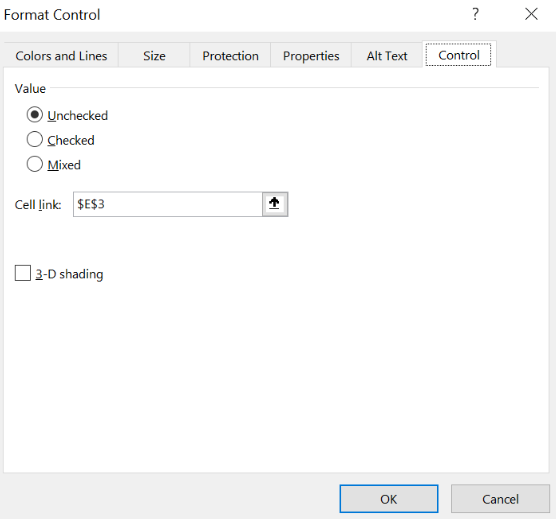 Figure 10. Link a checkbox to a cell
- When we select the checkbox in the linked cell will appear value TRUE, and when we unselect the box cell value will change to FALSE
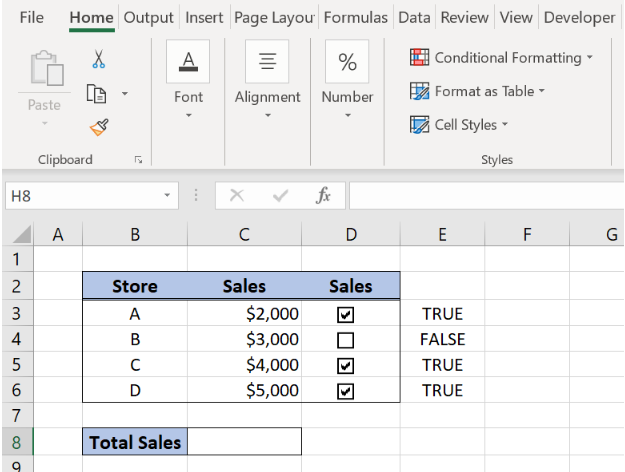 Figure 11. checkbox value
Now we can apply the formula if the checkbox is checked:
- Select the cell C8 and insert the formula
=SUMIFS($C$3:$C$6,$E$3:$E$6,TRUE) - Press enter
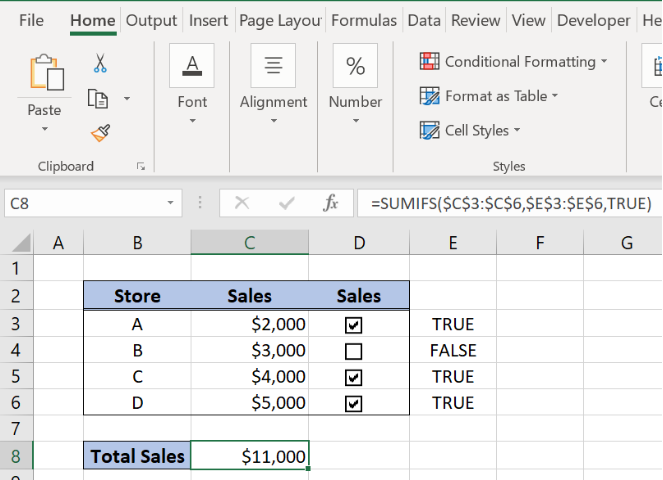 Figure 12. formula if checkbox checked
- SUMIFS function summarize Sales values per store whenever the condition in the column E is TRUE (when checkbox is selected)
Instant Connection to an Excel Expert
Most of the time, the problem you will need to solve will be more complex than a simple application of a formula or function. If you want to save hours of research and frustration, try our live Excelchat service! Our Excel Experts are available 24/7 to answer any Excel question you may have. We guarantee a connection within 30 seconds and a customized solution within 20 minutes.


Leave a Comment