

Assume that you have created some unnecessary named ranges in Excel. Or you needed them at some point, but you no longer need them. Do you know how you can delete the named ranges? This post provides a step by step guide on how one can delete a named range.
Step 1: Open the worksheet
The first thing we need to do for us to be able to delete named range is to open the worksheet with the range that we want to delete. To open the sheet or workbook, simply double-click on it.
Step 2: Go to Name Manager
After opening the sheet, now head to the ribbon and click on the Formula tab. In the Formula tab, you will be able to see the Name Manager as shown in figure 1 below;
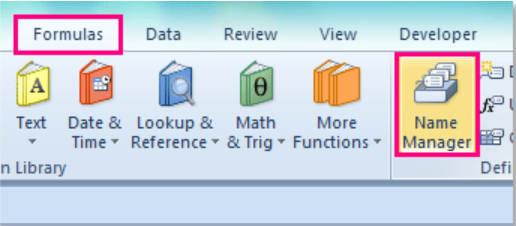 Figure 1: Name Manager
Step 3: Select the named ranges to delete
Once you have opened the Name Manager window, you will be able to select either all or only those named ranges you wish to delete. To select all named ranges, simply press the Shift key. And if your intention is to delete only a few named ranges, hold down the Ctrl key and the select those ranges to delete. After you have selected them, click on delete button.
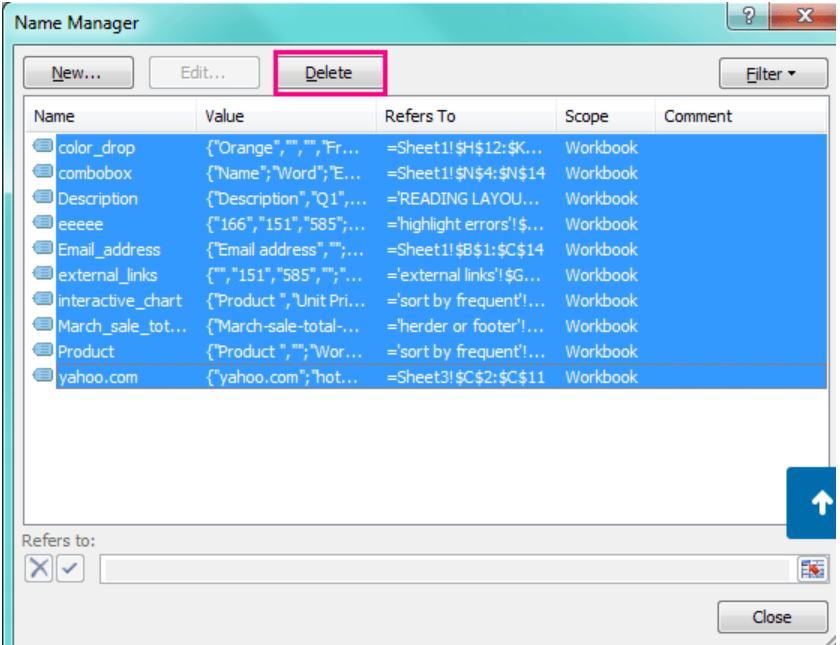 Figure 2: Selecting named ranges to delete
Step 4: Delete
Now that you have selected those named ranges to delete, all you need to do is click on delete. You will see a prompt box reminding you if you are sure to delete the named ranges. Click Ok again to delete.
 Figure 3: Prompt box
Instant Connection to an Expert through our Excelchat Service
Most of the time, the problem you will need to solve will be more complex than a simple application of a formula or function. If you want to save hours of research and frustration, try our live Excelchat service! Our Excel Experts are available 24/7 to answer any Excel question you may have. We guarantee a connection within 30 seconds and a customized solution within 20 minutes.


Leave a Comment