

We use cell styles to apply consistent formatting characteristics such as fonts and font size, cell borders, cell shading, and number formats. In this tutorial, we will learn how to apply, create or remove a cell style.
 Figure 1 – How to apply or input cell style
How to Apply a Cell Style
We can apply a Title cell style or total cell style with these steps:
- We will select the cells, rows or columns we want to format. In this case, we will select A4:A8 from our data.
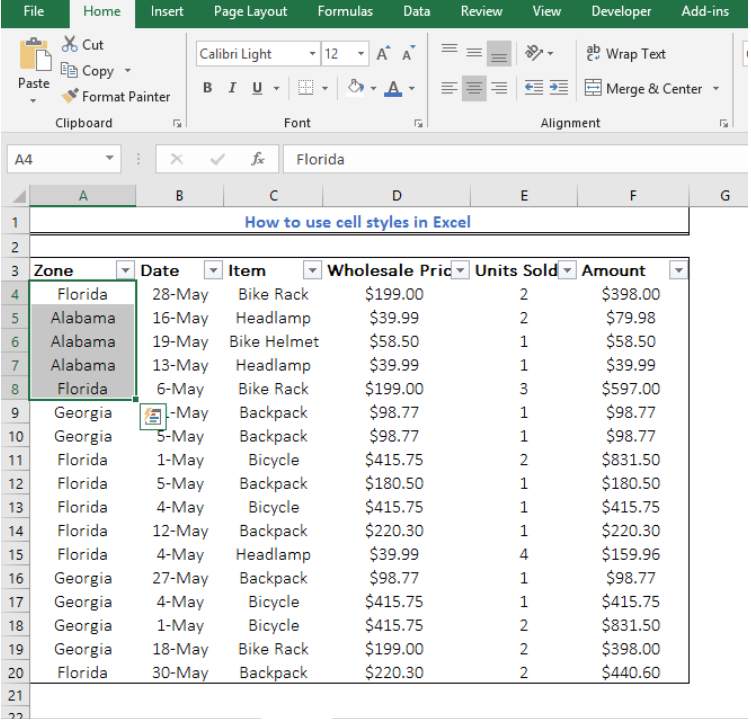 Figure 2 – How to use cell styles
- Now, we will go to the Home tab and click on More in the Styles groups.
- In the drop-down box, we will select the style we want and click Apply.
 Figure 3 – Using Heading 2 Style
- We will apply the cell style Bad, so our result will look like this:
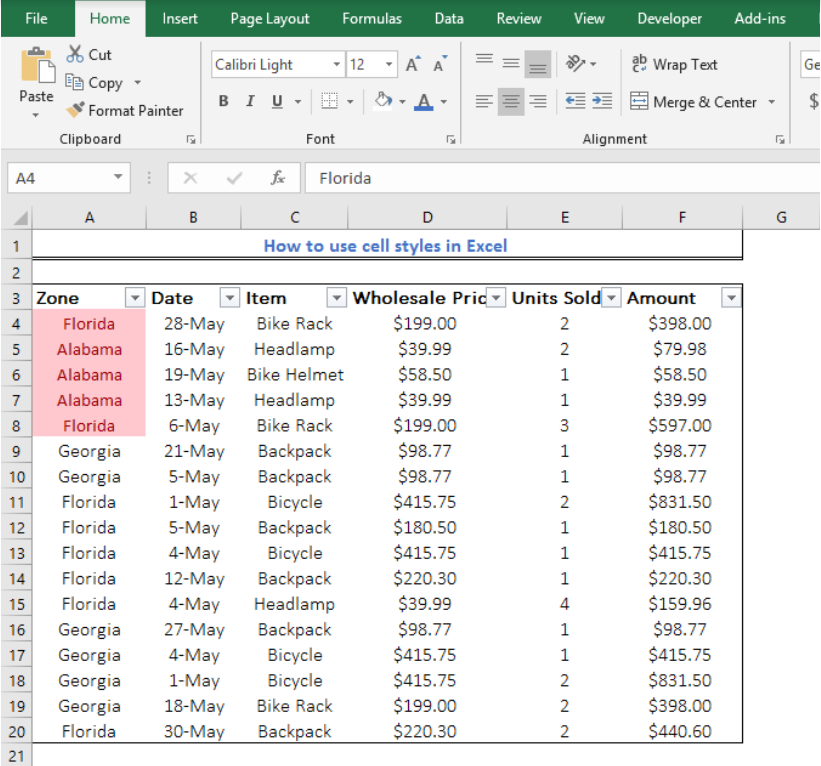 Figure 4 – How to apply total cell style
How to Create a Custom Cell Style
- We will select the cells we want to apply a custom a cell style. In this case, we select A3:A8
- We will go to the Home tab, and click the More drop-down arrow in the Styles group
- At the bottom, we will find New Cell Style
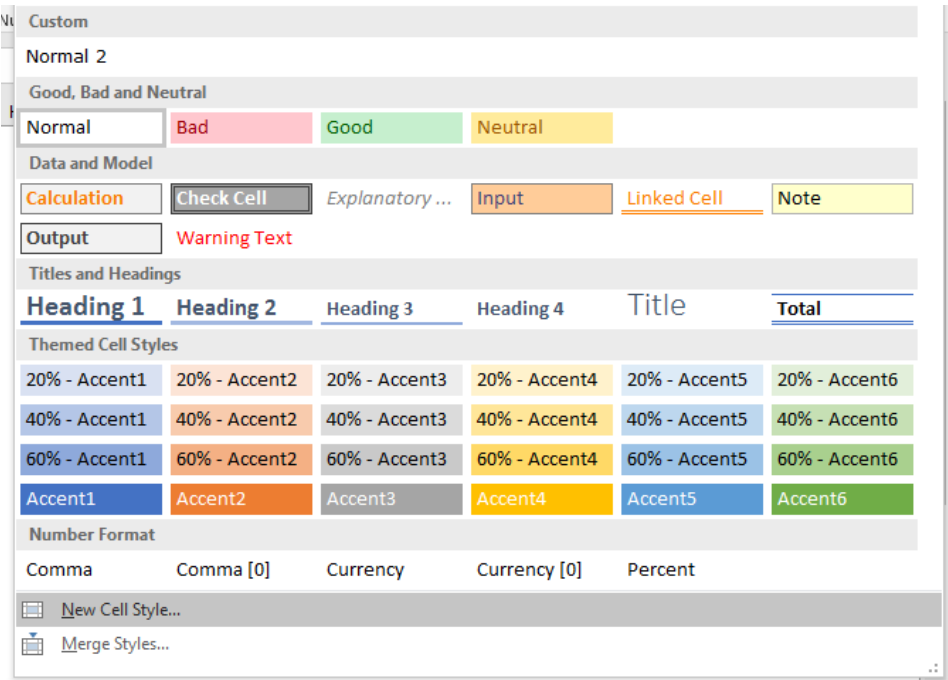 Figure 5 – Excel styles
- In the style name box, we will enter the appropriate name for this new style
 Figure 6 – Title Cell Style
- Next, we will select Format below Style name in Figure 6. In the Formats Cells dialog, we will select the font and colors we want. Then we will select OK.
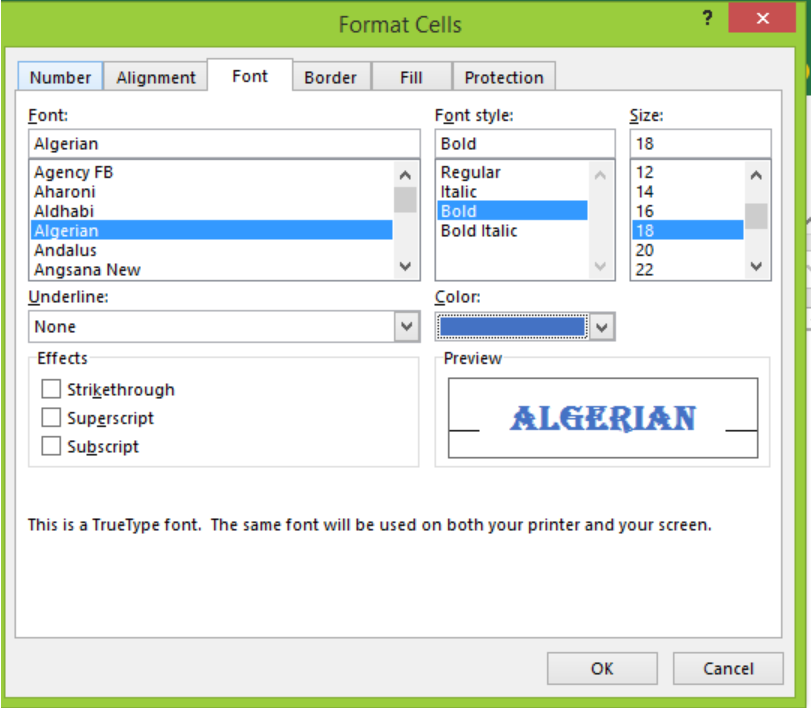 Figure 7 – How to use styles
- In the Style dialog, under Styles Includes (By Examples), we will clear the checkboxes for the formatting we don’t want to include
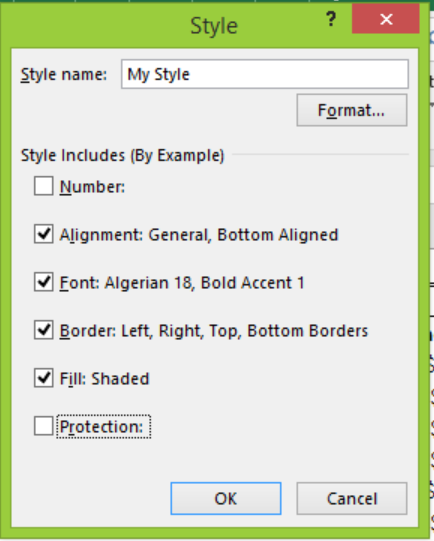 Figure 8 – How to apply cell styles
- We will select Ok. Now we can apply our new cell style as shown in the first section.
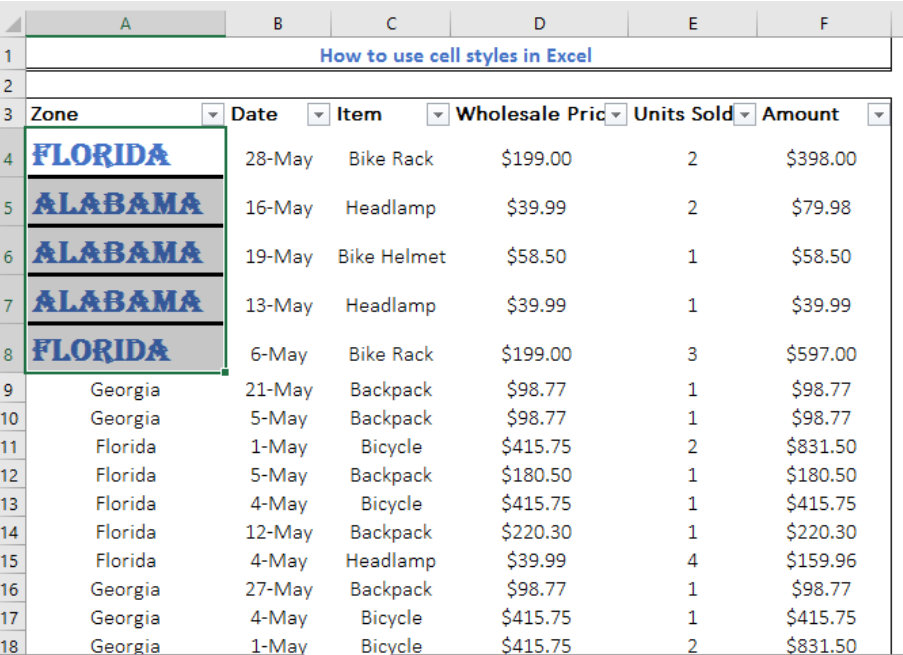 Figure 9 – How to use cell styles
How to Create a Cell Style By Modifying an Existing Cell Style
- In the Home tab, we will click on the More dropdown arrow in the Styles group
- Next, we will apply any of these steps:
- We can either modify an existing cell style by right-clicking on the cell style and selecting Modify
 Figure 10 – How to use title styles
-
- Alternatively, we can create a duplicate of the existing cell style. We will right-click and then select Duplicate
 Figure 11 – How to apply or input cell style
- Next, in the modify cell style, we will select Format
- On the Various tabs in the Format Cells dialog box, we will select the format that we want and then click OK
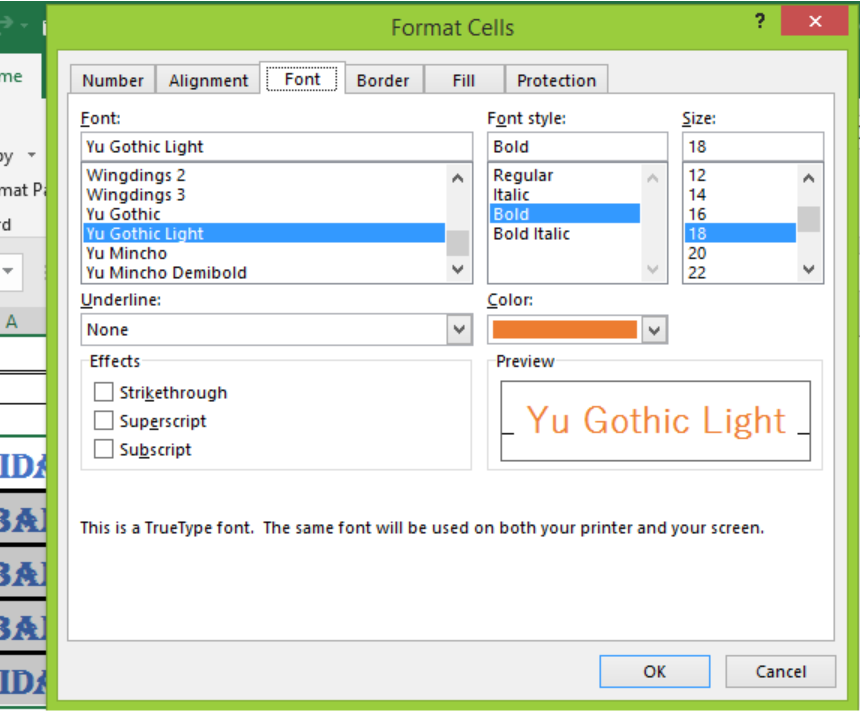 Figure 12 – How to use title style
- In the Cells dialog box, under styles include, we will select or clear the checkboxes for all the formats we want or do not want.
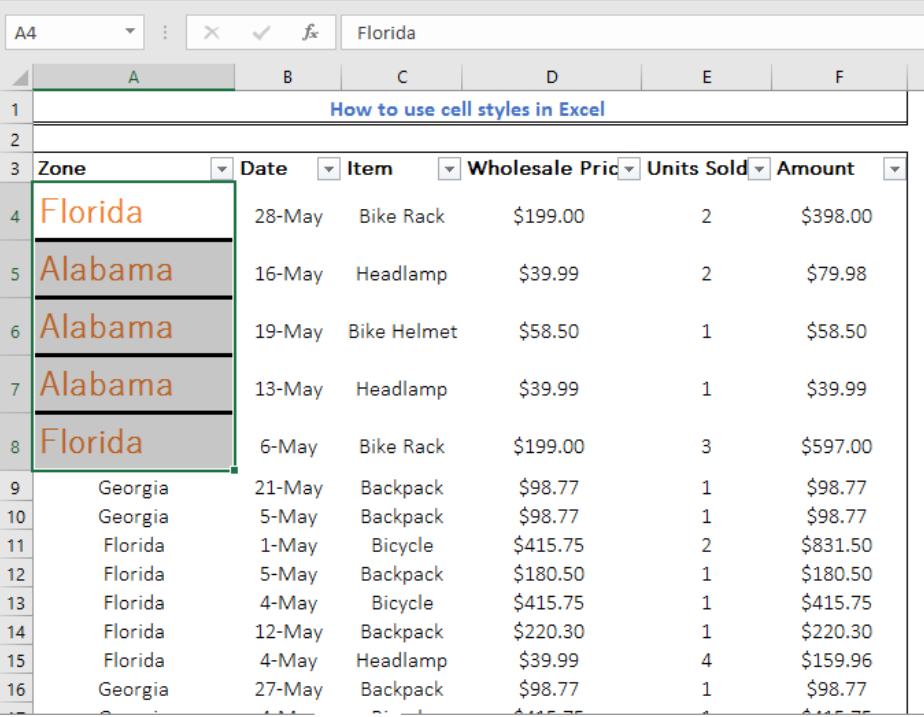 Figure 13 – How to modify cell styles
How to Remove a Cell Style from Data
We can remove the cell style from data in selected cells without deleting the cell style.
- We will select the cells we want to remove their formatted style
- We will go to the Home Tab and select the More drop-down arrow in the Styles group
- Next, we will select Normal, under the Good, Bad or Neutral group
 Figure 14 – Using Excel Styles
How to Delete Predefined Custom Cell Styles
When we want to remove a cell style from Excel, we will take these steps:
- We will go to the Home tab, in the styles group, we will click the More drop-down arrow in the style gallery
- To delete, we will right-click on the cell style and click Delete
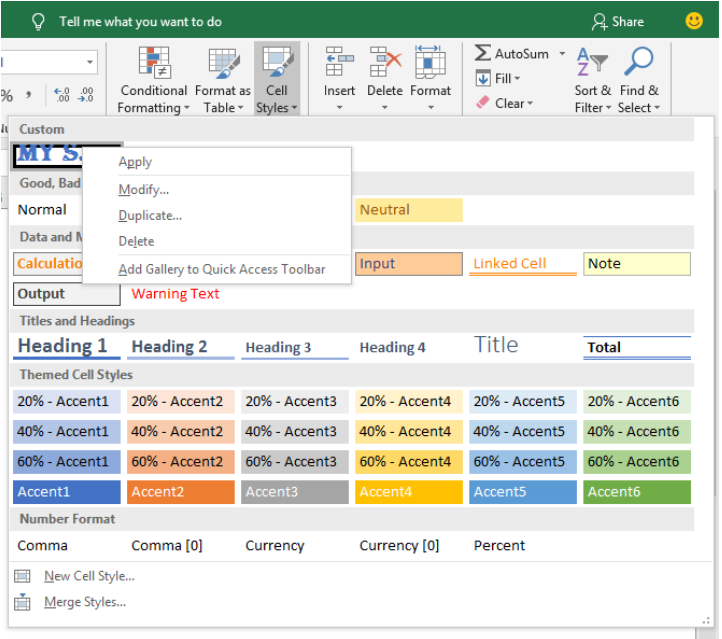 Figure 15 – Using Cell Styles
Instant Connection to an Excel Expert
Most of the time, the problem you will need to solve will be more complex than a simple application of a formula or function. If you want to save hours of research and frustration, try our live Excelchat service! Our Excel Experts are available 24/7 to answer any Excel question you may have. We guarantee a connection within 30 seconds and a customized solution within 20 minutes.


Leave a Comment