

AutoFill in Excel is a great feature that saves us a lot of time in entering numbers or values that follow a specific pattern. Instead of entering values manually, we can use the AutoFill options to fill in values for rows and columns based on the values of other cells.
AutoFill increases efficiency in creating spreadsheets, and it works for filling in numbers, dates, formats and formulas.
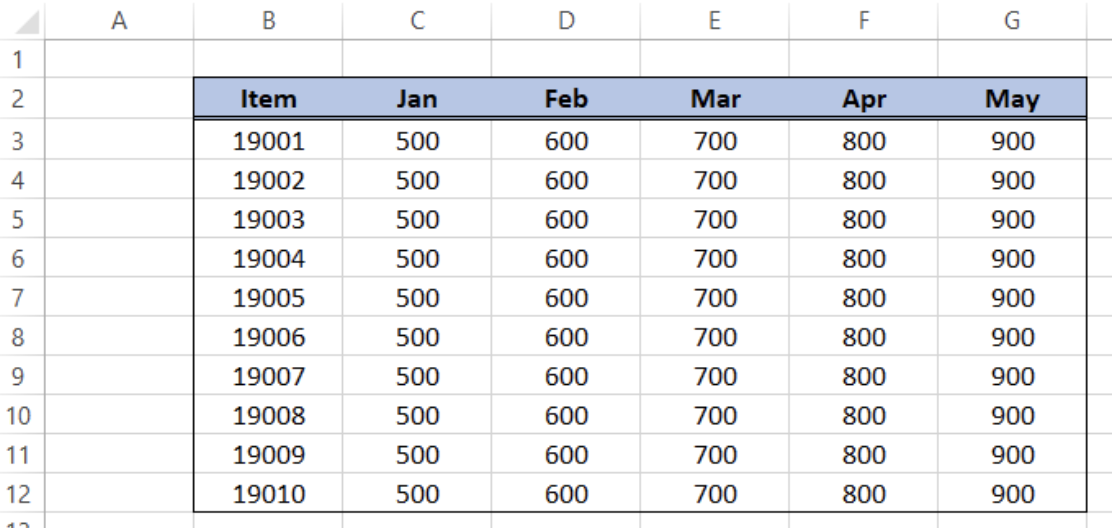 Figure 1. Final result: How to do AutoFill
AutoFill numbers
AutoFill feature will fill in the cells based on the values of the first selected cells, creating a pattern that applies to rest of the cells.
Example 1:
Suppose we want to fill the items in column B, incrementing by 1. We simply enter the first two numbers in cells B3 and B4.
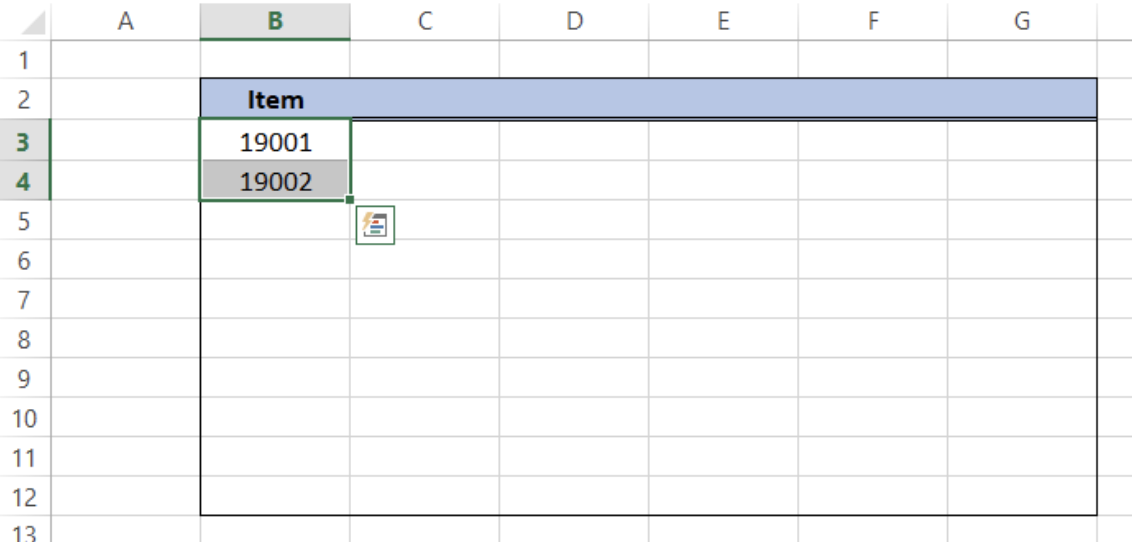 Figure 2. Sample values to AutoFill in Excel 2013
Then we click the fill handle, located at the lower right corner of the cells. When we hover the mouse over the lower right corner of the cell, the cursor shows a plus sign, which is the fill handle. Click, hold and drag the fill handle down to cell B12. As a result, column B will now have a complete list of item numbers.
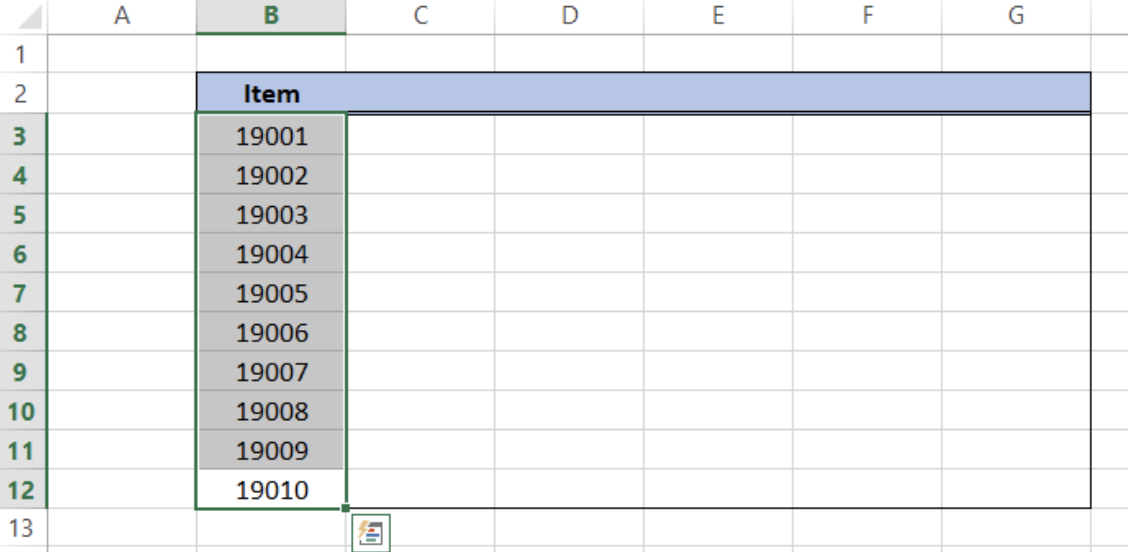 Figure 3. Output: AutoFill numbers
Alternatively, we can use the Fill Series option in AutoFill. The Fill Series option will appear when we right-click the fill handle and drag to select the cells. Upon release of the mouse button, the Fill Series option will appear. Selecting the Fill Series will likewise fill the numbers in numeric order.
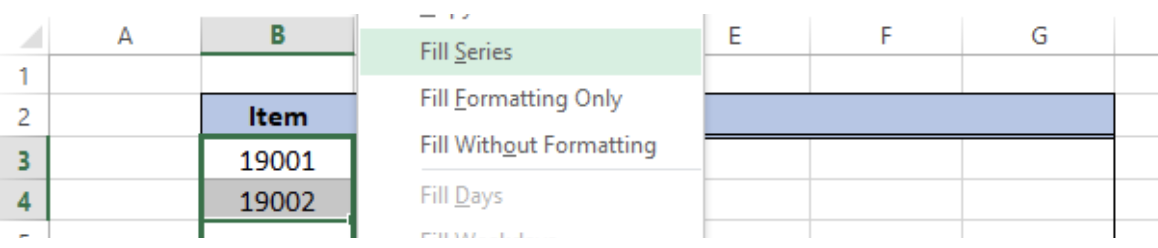 Figure 4. Fill Series option
Example 2:
Let us try again but this time, we enter 19001 and 1911 in cells B3 and B4.
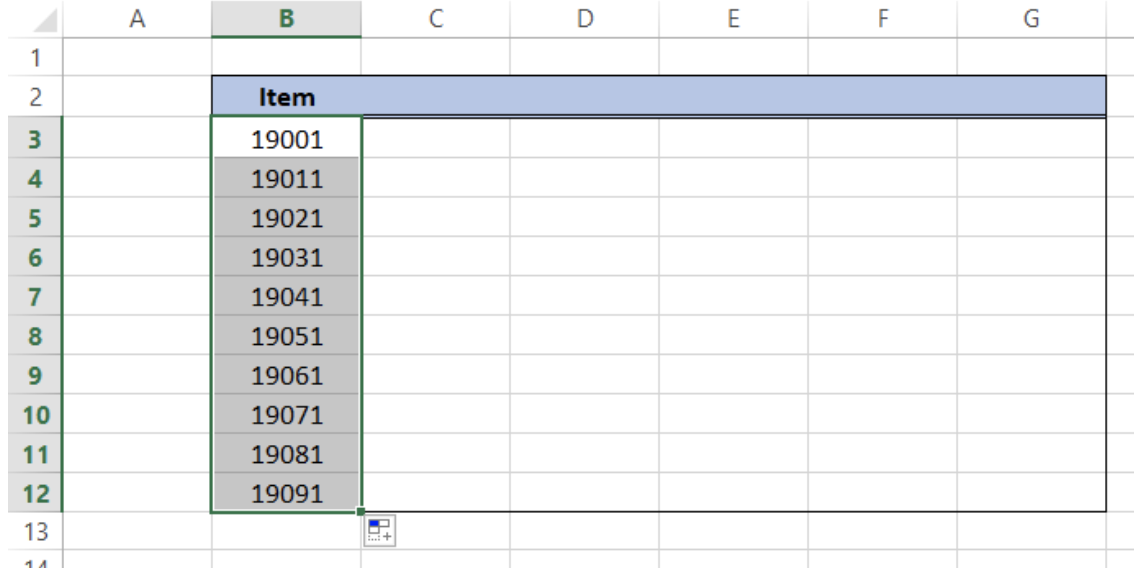 Figure 5. Output: AutoFill using Fill Series
Note that the pattern established by AutoFill from the first two cells is an increment of 10. Hence, the succeeding cells are filled with values adding 10 to the previous cell.
How to AutoFill dates
Example 1: AutoFill months
Suppose we want the header to display the month name from January to May. We enter “Jan” in cell C2.
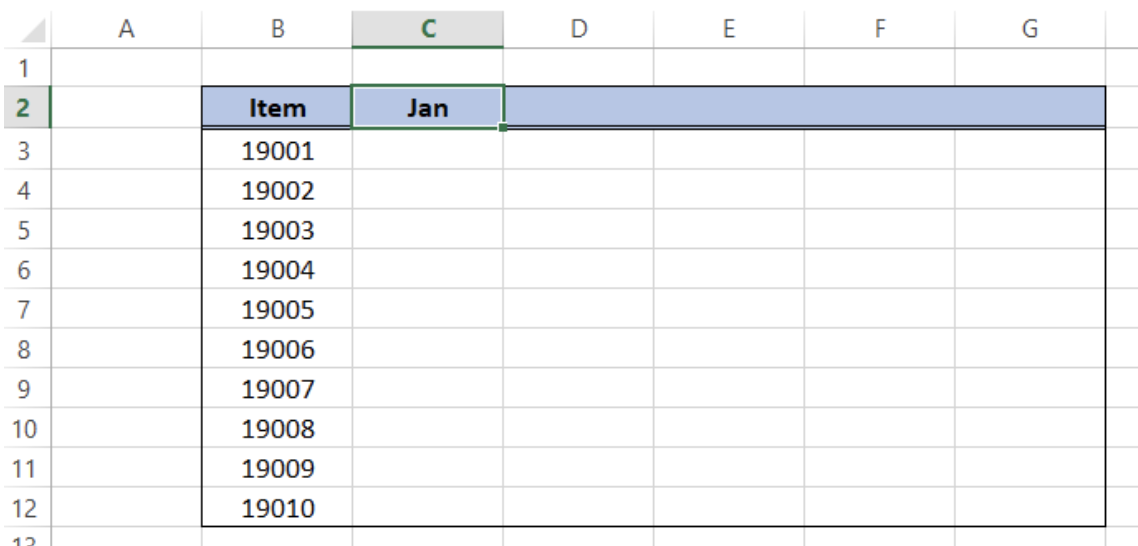 Figure 6. Entering “Jan” in the first cell in the series
Using AutoFill, we click and drag the fill handle to the right up to cell G2. AutoFill automatically fills in the month names.
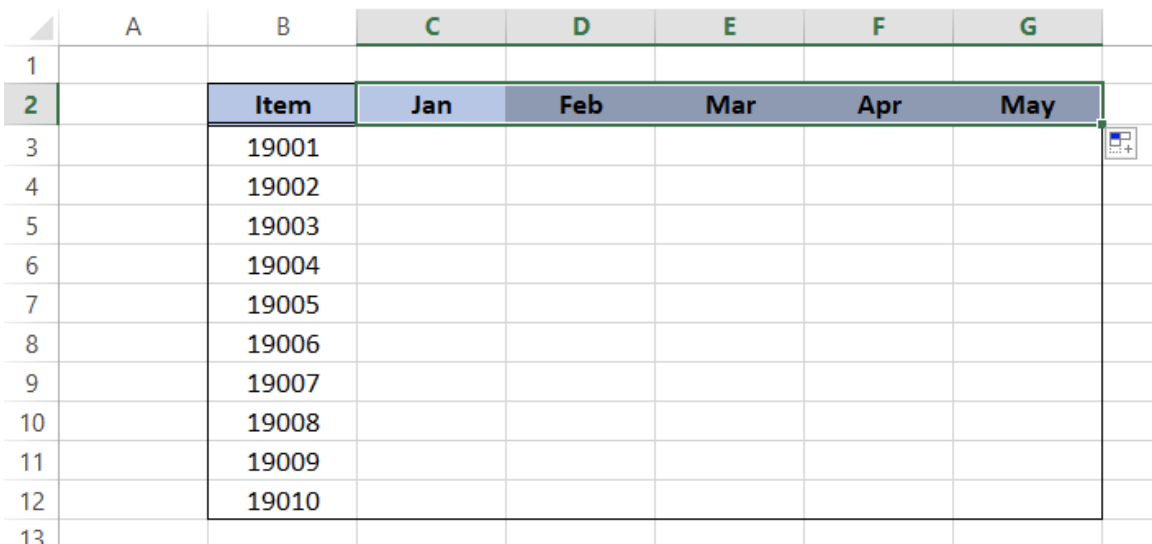 Figure 7. Outputl: AutoFill months
There are several other options to AutoFill dates that makes it easy for us to enter due dates, target dates and any other pattern involving dates.
Example 2: AutoFill due dates
Suppose we have the first due date on January 1, 2019 and we want to fill the succeeding cells with the monthly due date.
- Enter the first date in the series “01-Jan-2019” in cell B3
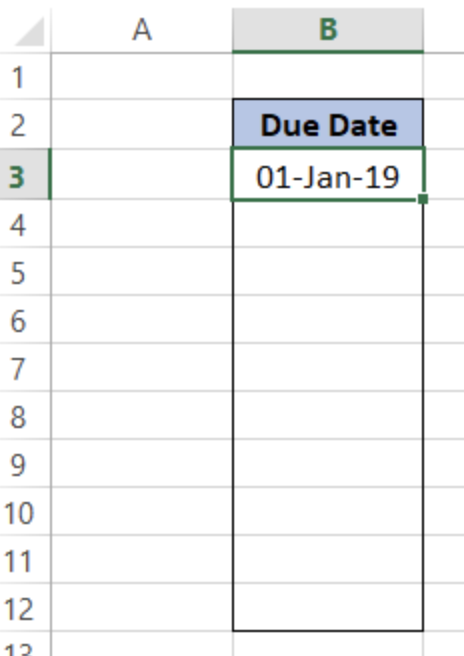 Figure 8. Entering the first due date
- Right-click the fill handle and drag down to B12
- Select Fill Months in the option
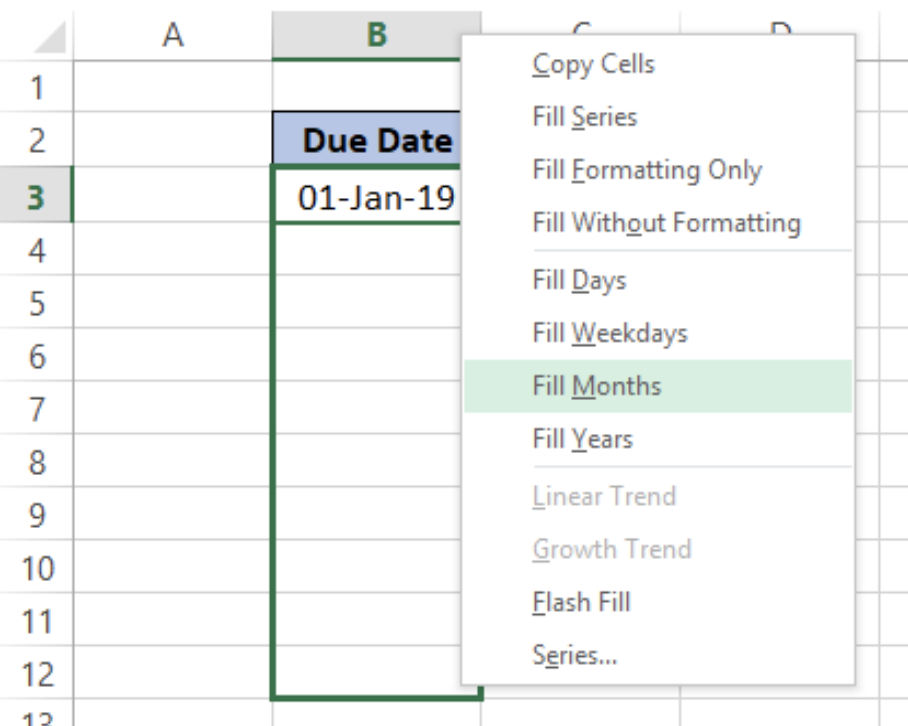 Figure 9. AutoFill Months
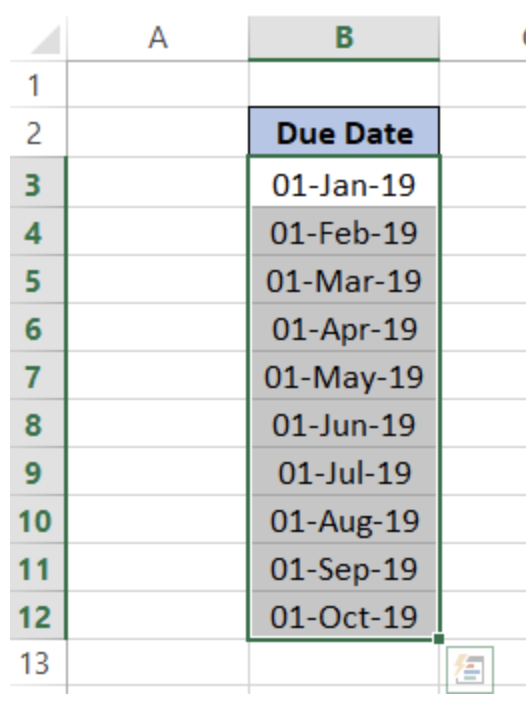 Figure 10. Output: AutoFill dates
AutoFill will fill the selected cells with the first day of the succeeding months. We can also choose other AutoFill options such as Fill Days, Fill Weekdays and Fill Years.
Example 3: AutoFill dates in weeks
- Select cells B2:B3
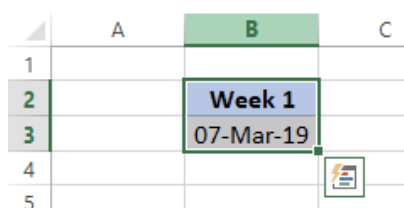 Figure 11. Selecting the first week to AutoFill
- Click the fill handle and drag to the right up to column H
 Figure 12. Output: AutoFill dates by weeks
AutoFill instantly fills the cells with one week interval.
Fill without Formatting
There is also an option in AutoFill where we can fill without formatting.
- Select cells C3 and C4
- Right click the fill handle and drag down to C12
- Select the option Fill without Formatting
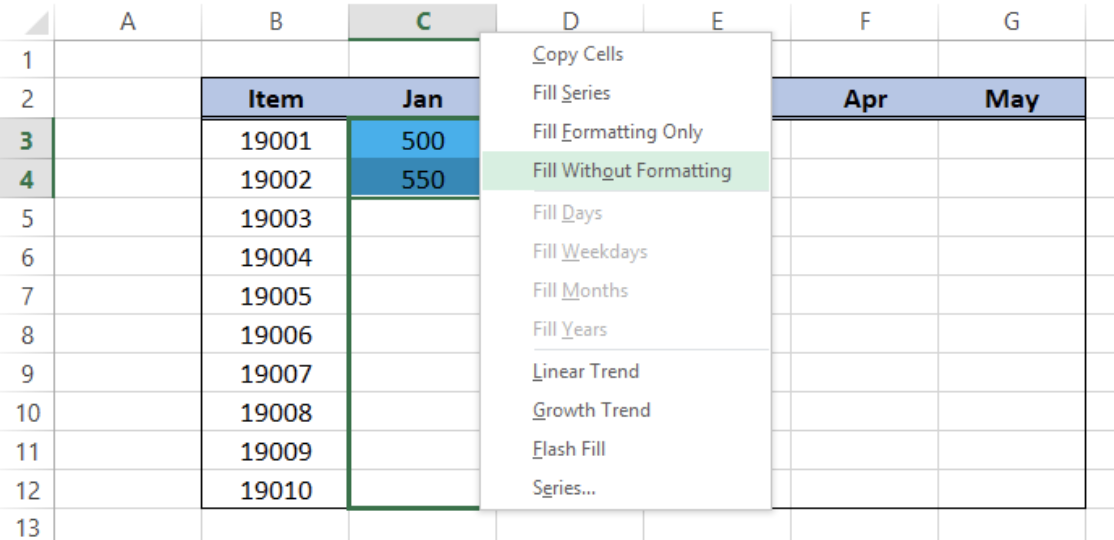 Figure 13. Fill without Formatting option
Cells C5 to C12 will be filled with values based on the pattern of C3 and C4, but without the formatting of blue fill color.
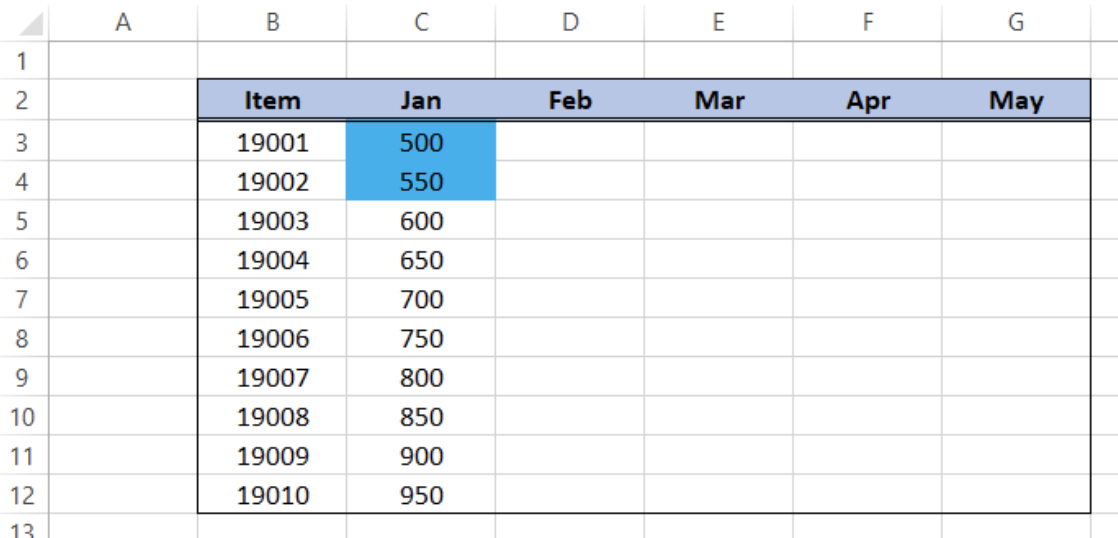 Figure 14. Output: Using AutoFill without formatting
Fill Formatting Only
Conversely, there is also an option in AutoFill where we can fill only the formatting of the selected cells.
- In the example below, we select cells B3:B12 and click and drag the fill handle to the right up to column G.
- Then we select Fill Formatting Only in menu options
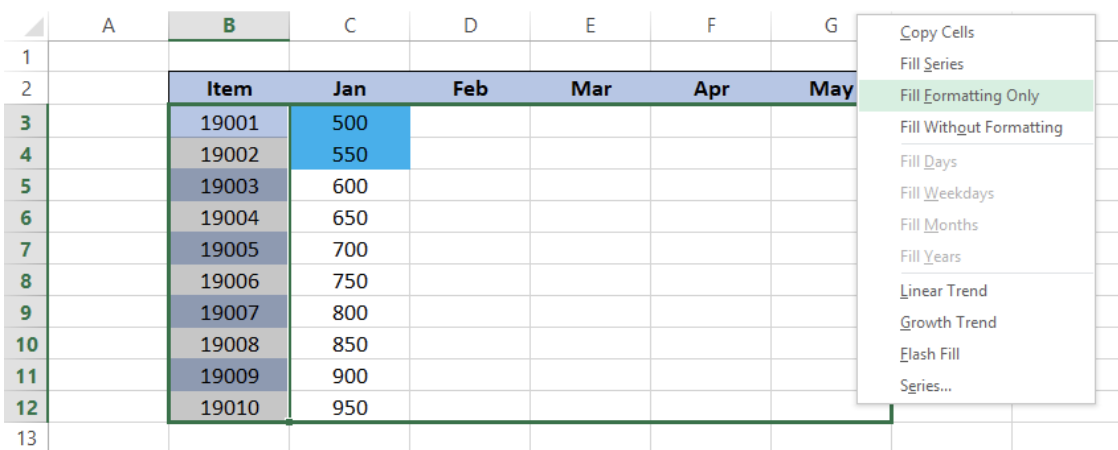 Figure 15. Fill Formatting Only option
As a result, the formatting is reflected in rows 3 to 12 of our table, from column B to column G.
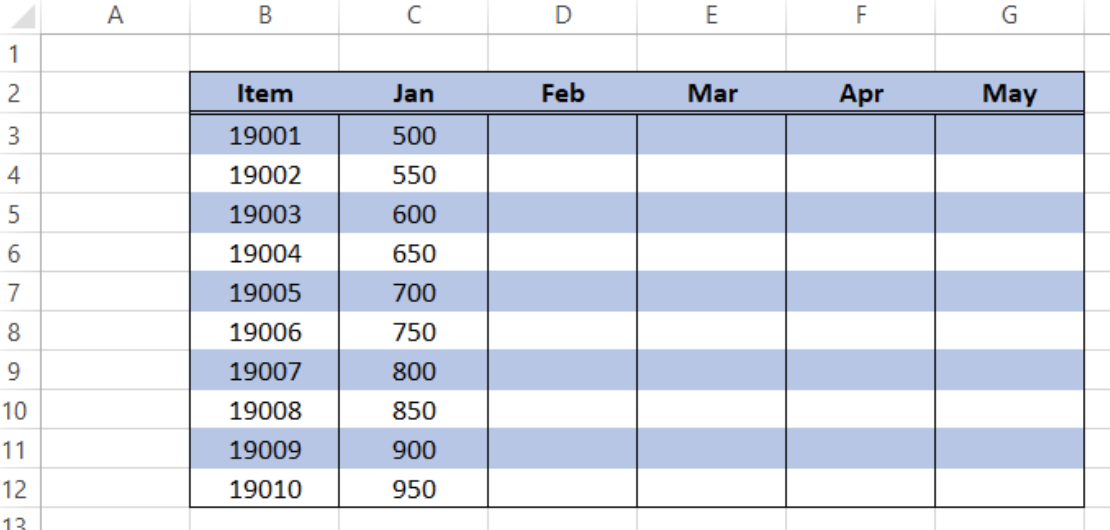 Figure 16. Output: How to do AutoFill with Fill Formatting Only
Instant Connection to an Excel Expert
Most of the time, the problem you will need to solve will be more complex than a simple application of a formula or function. If you want to save hours of research and frustration, try our live Excelchat service! Our Excel Experts are available 24/7 to answer any Excel question you may have. We guarantee a connection within 30 seconds and a customized solution within 20 minutes.


Leave a Comment